Public Products are products which are publicly available for use. These products may originate from Wavenet or other vendors who wants to market their products to external parties. Charges may be applicable for these products. Private Products are products which can only be onboarded and used by a company. These products are wholly managed by the ownership account and cannot be accessed by any other parties. |
1. Login to Ahasa.
2. On the Left Panel, expand Canvas and click Canvas Management.
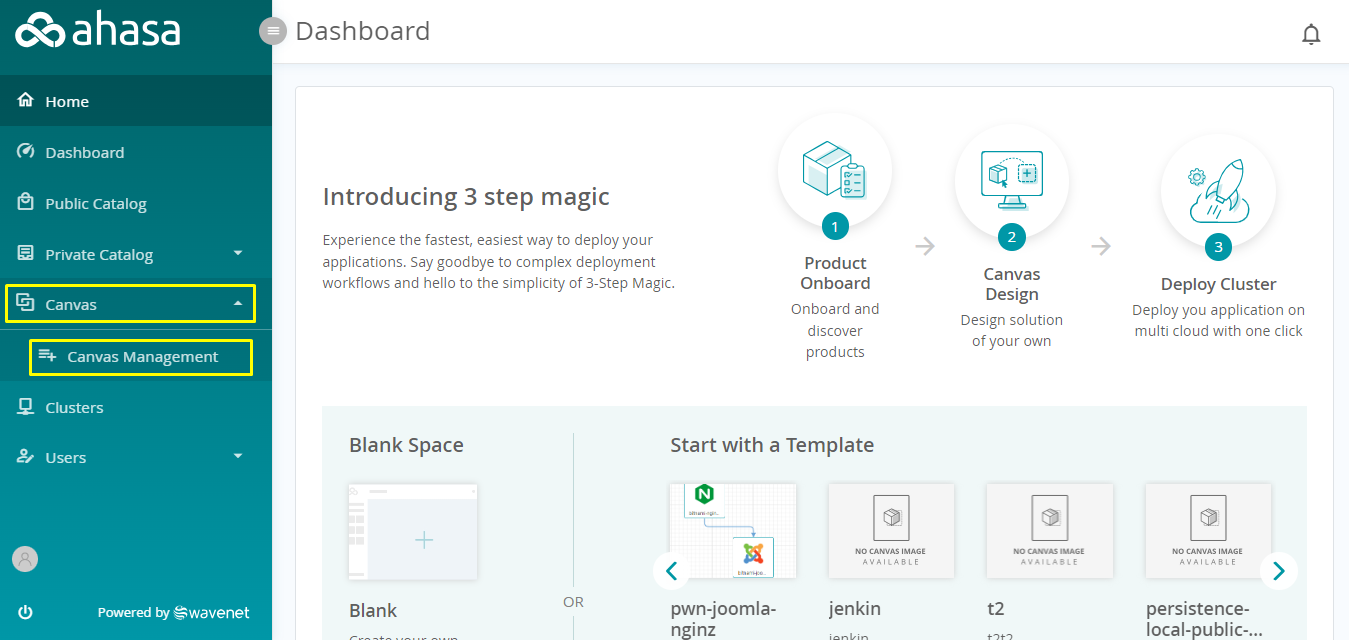
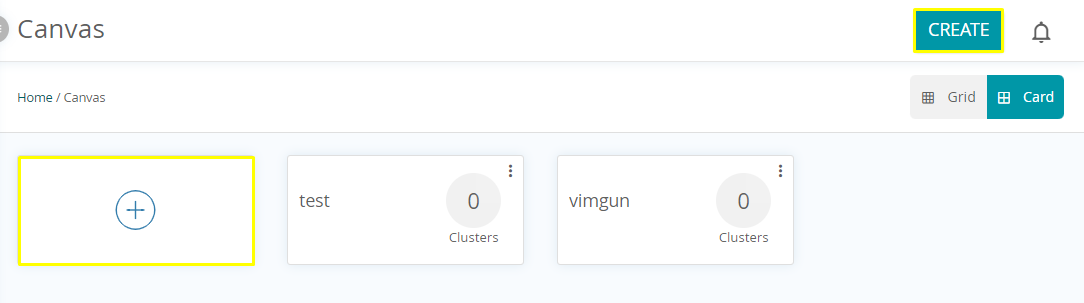
3. Click the + sign or the Create button to add a new canvas (Card View).
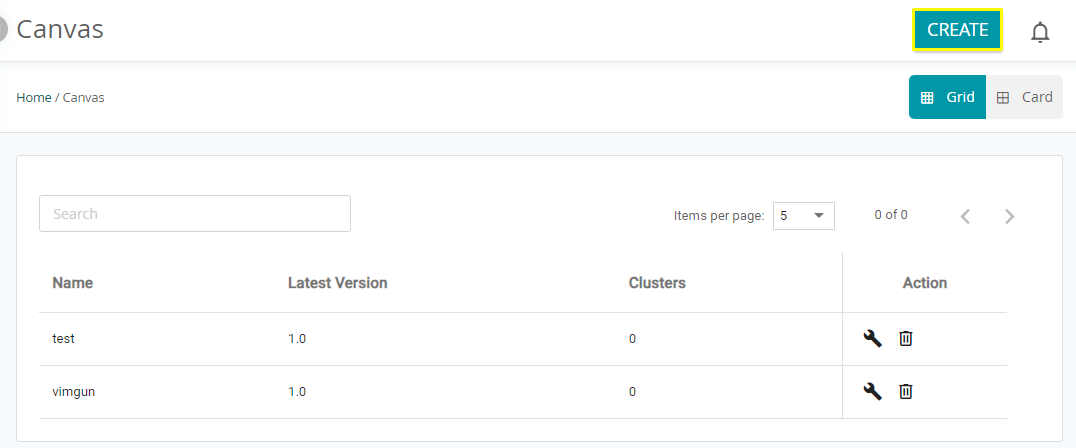
4. Click the Create button to add a new canvas (Grid View)
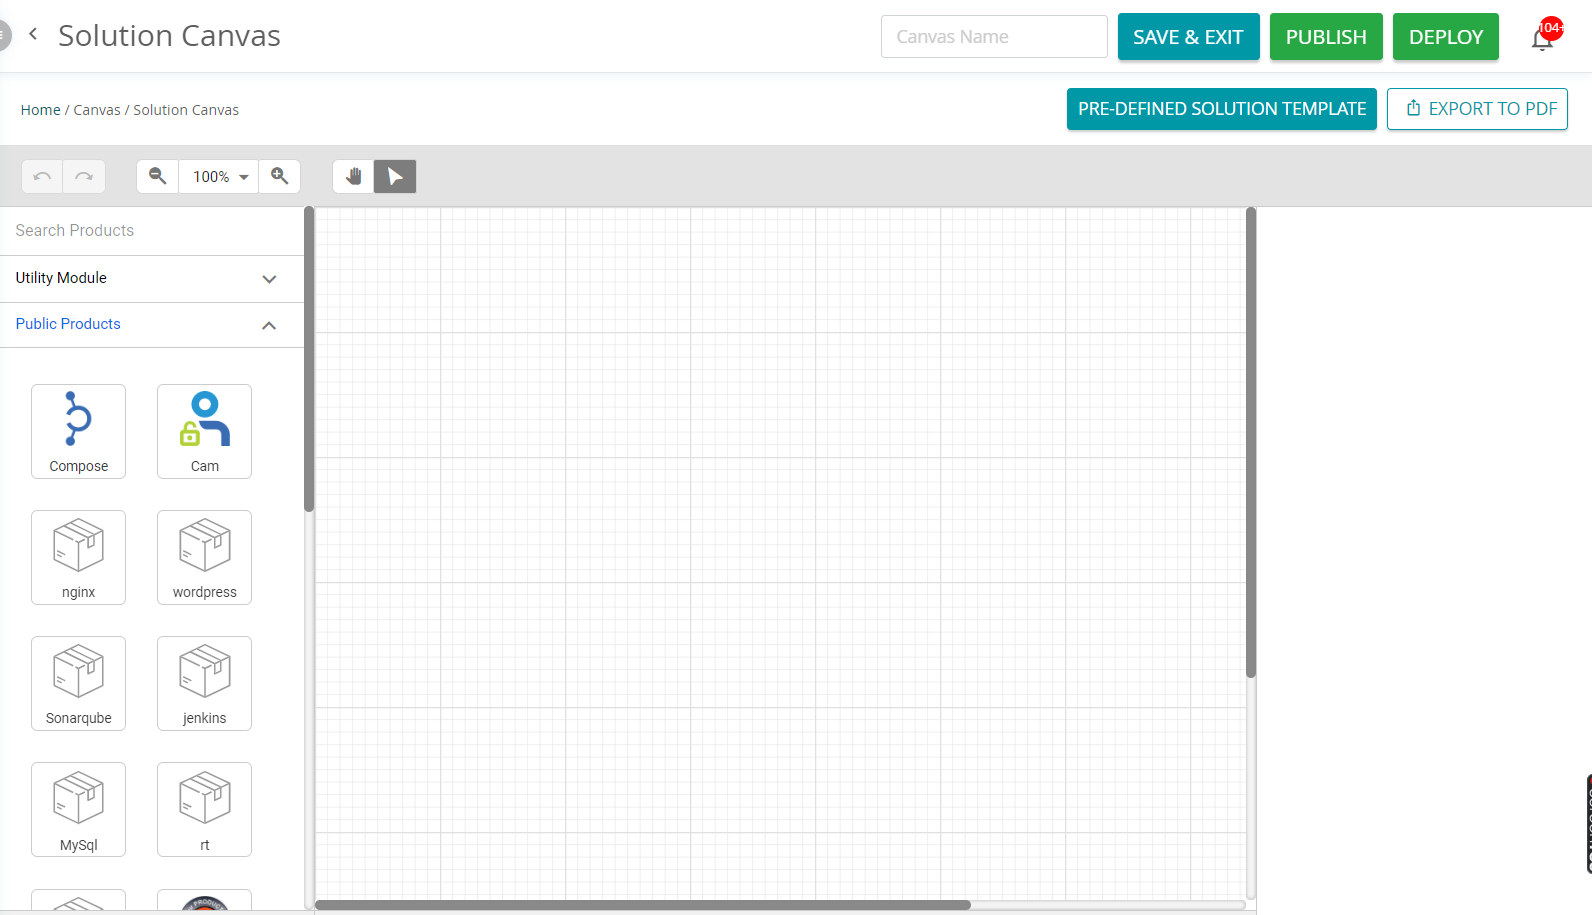
5. Refer below to know more about the Canvas UI Elements.

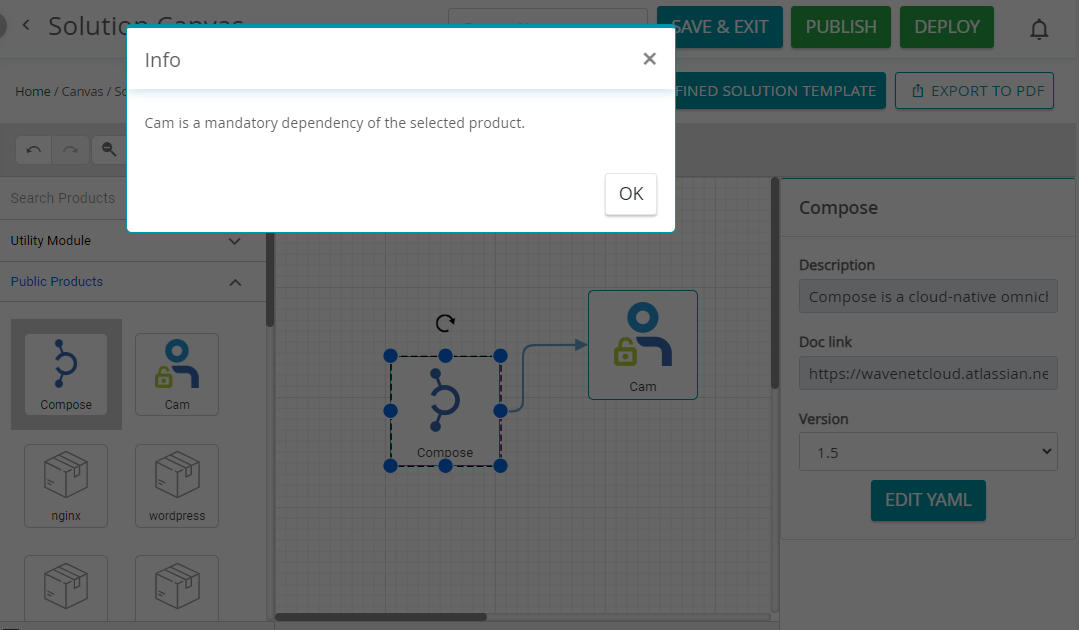
- When a product that has a Mandatory dependency on another product (created in the Products section), and is dragged and dropped into the Canvas, the Mandatory dependent product will automatically be added. Click Here to know more about product onboarding and management.
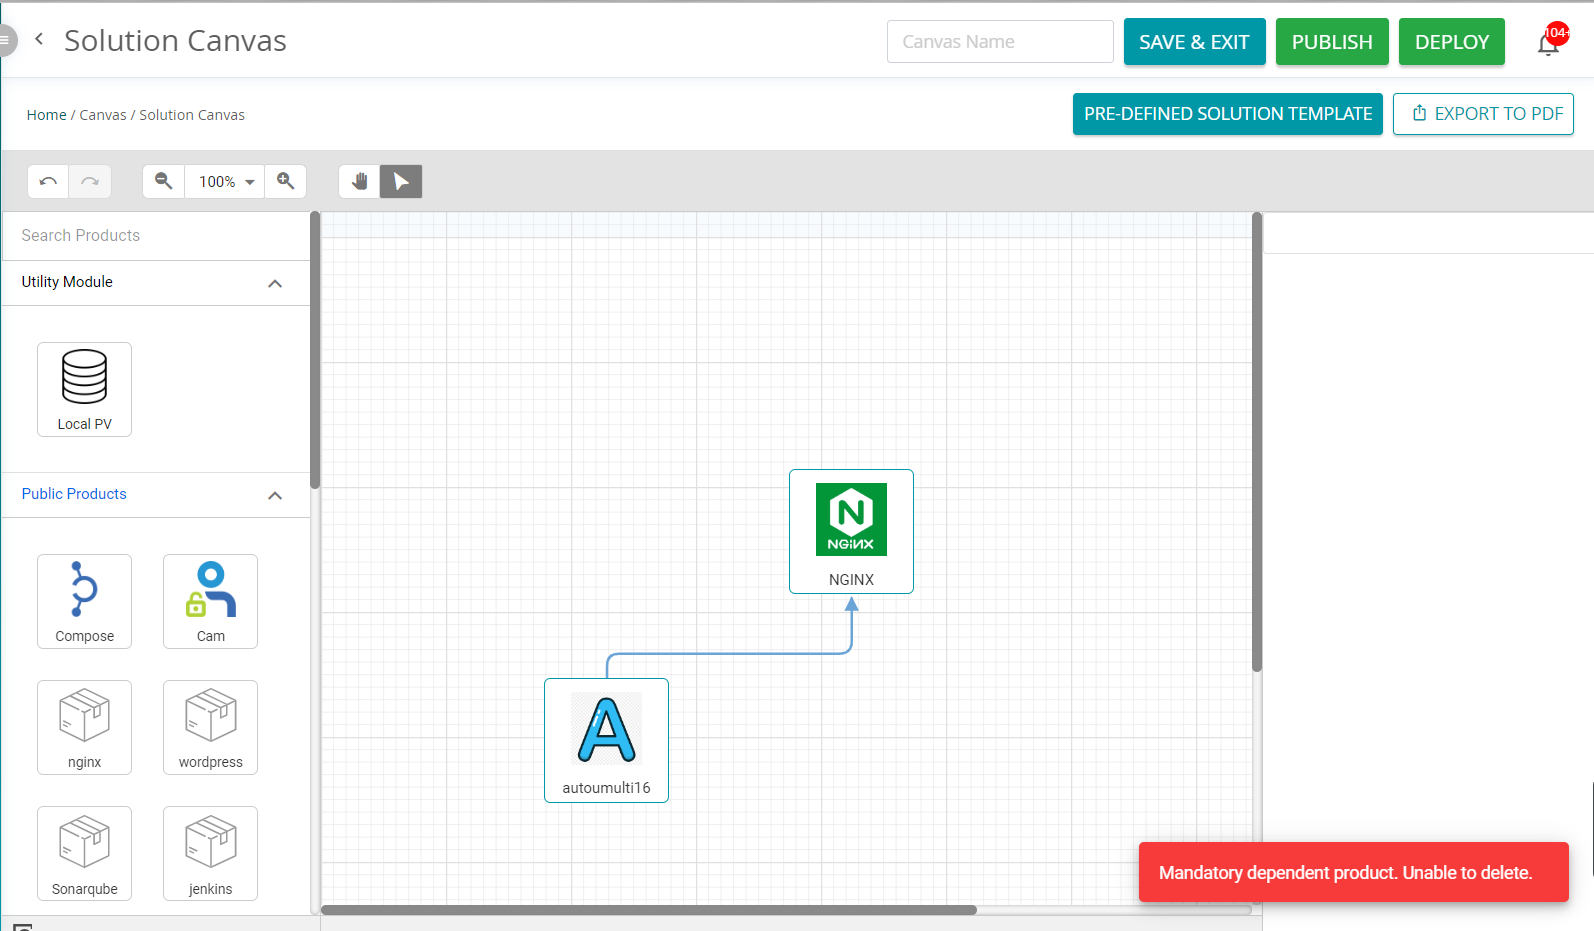
- Once the products are added, the automatically added product cannot be removed while the dependent product exists in the Canvas.
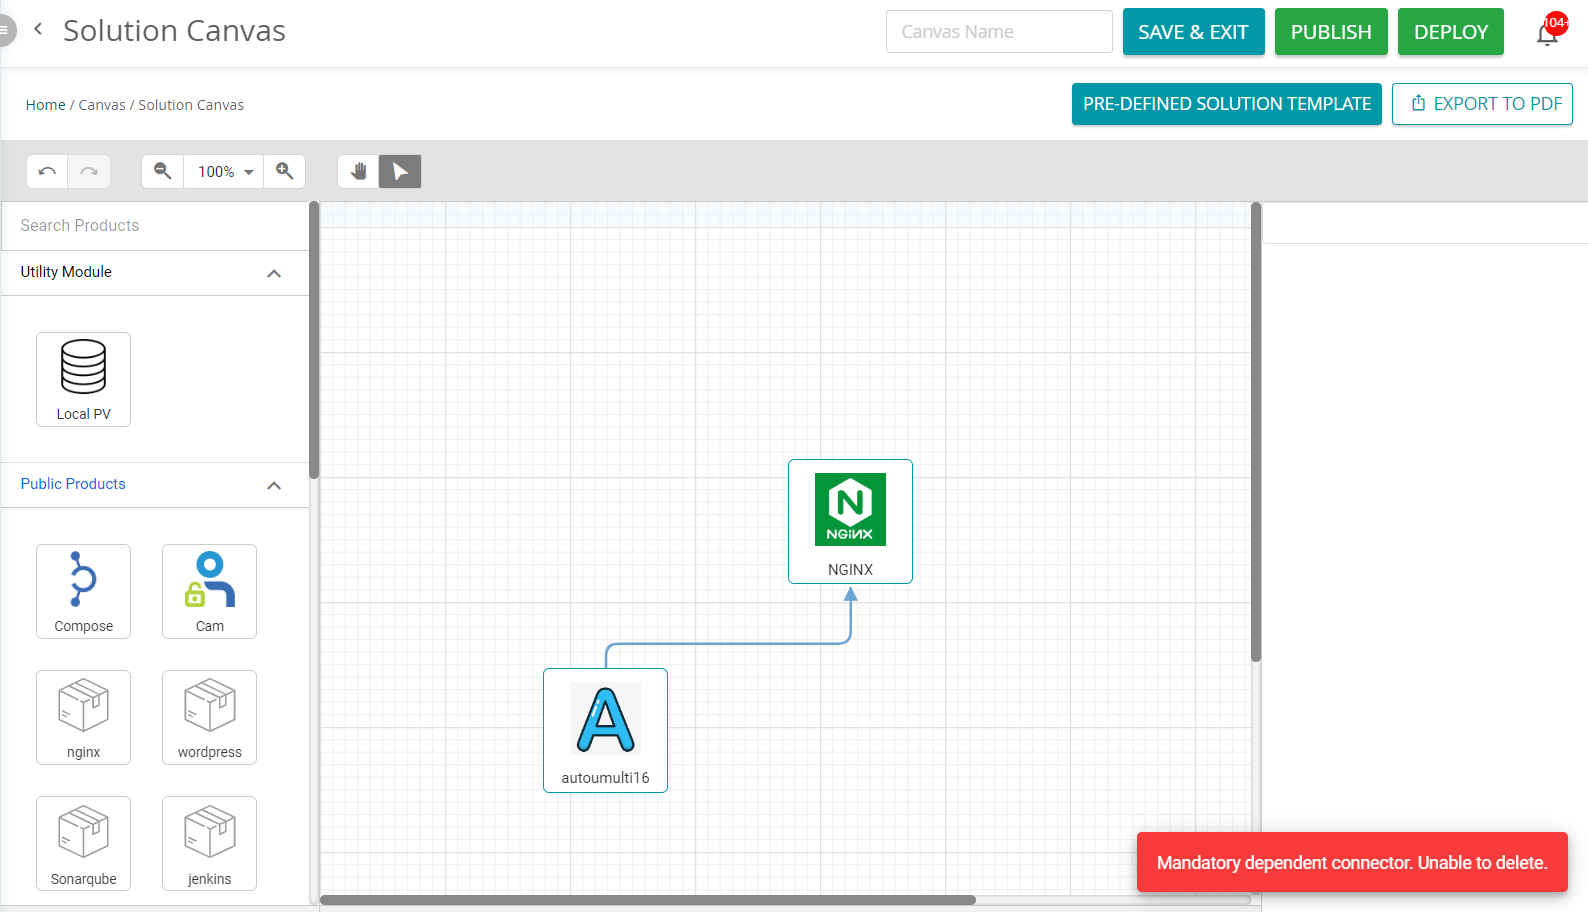
- The connection between the dependent products cannot be deleted. This is added as a configuration in version management.
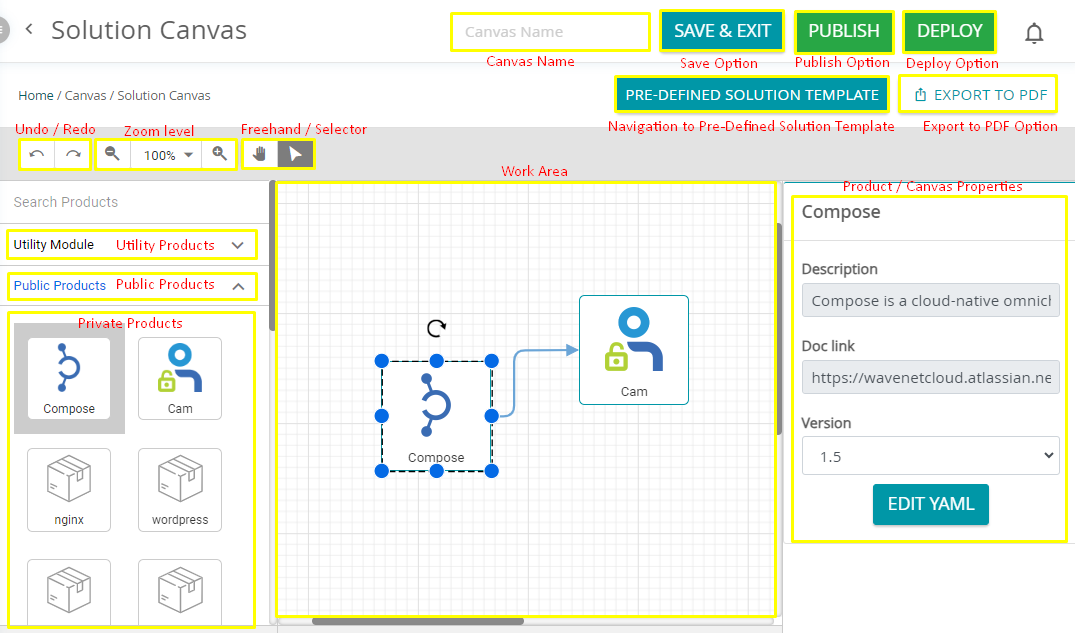
REFER SCREENSHOTS BELOW
9.1.1 Adding a Product to Canvas, Changing Product Properties, and Removing a Product from Canvas #
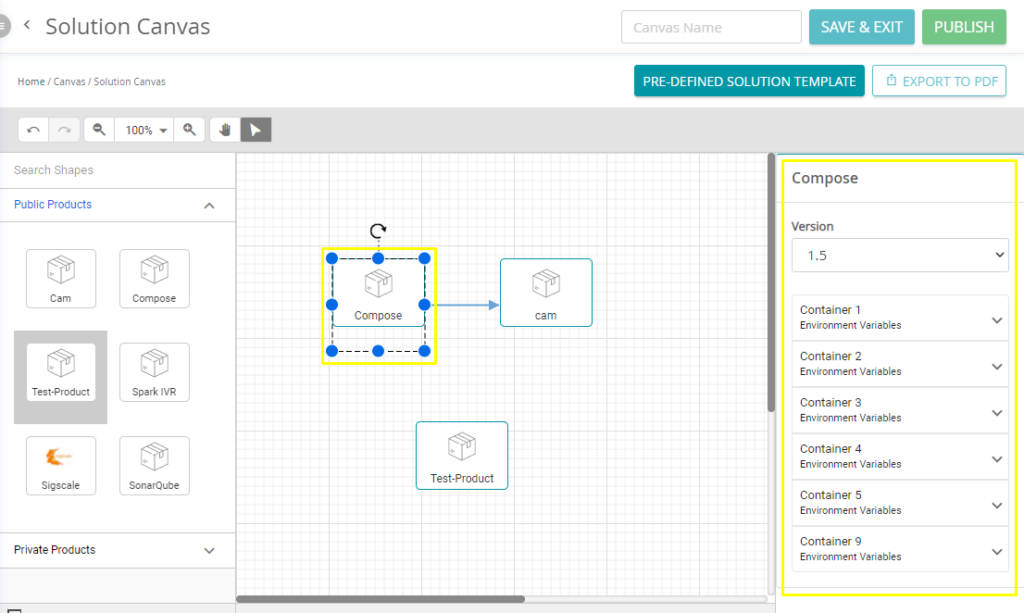
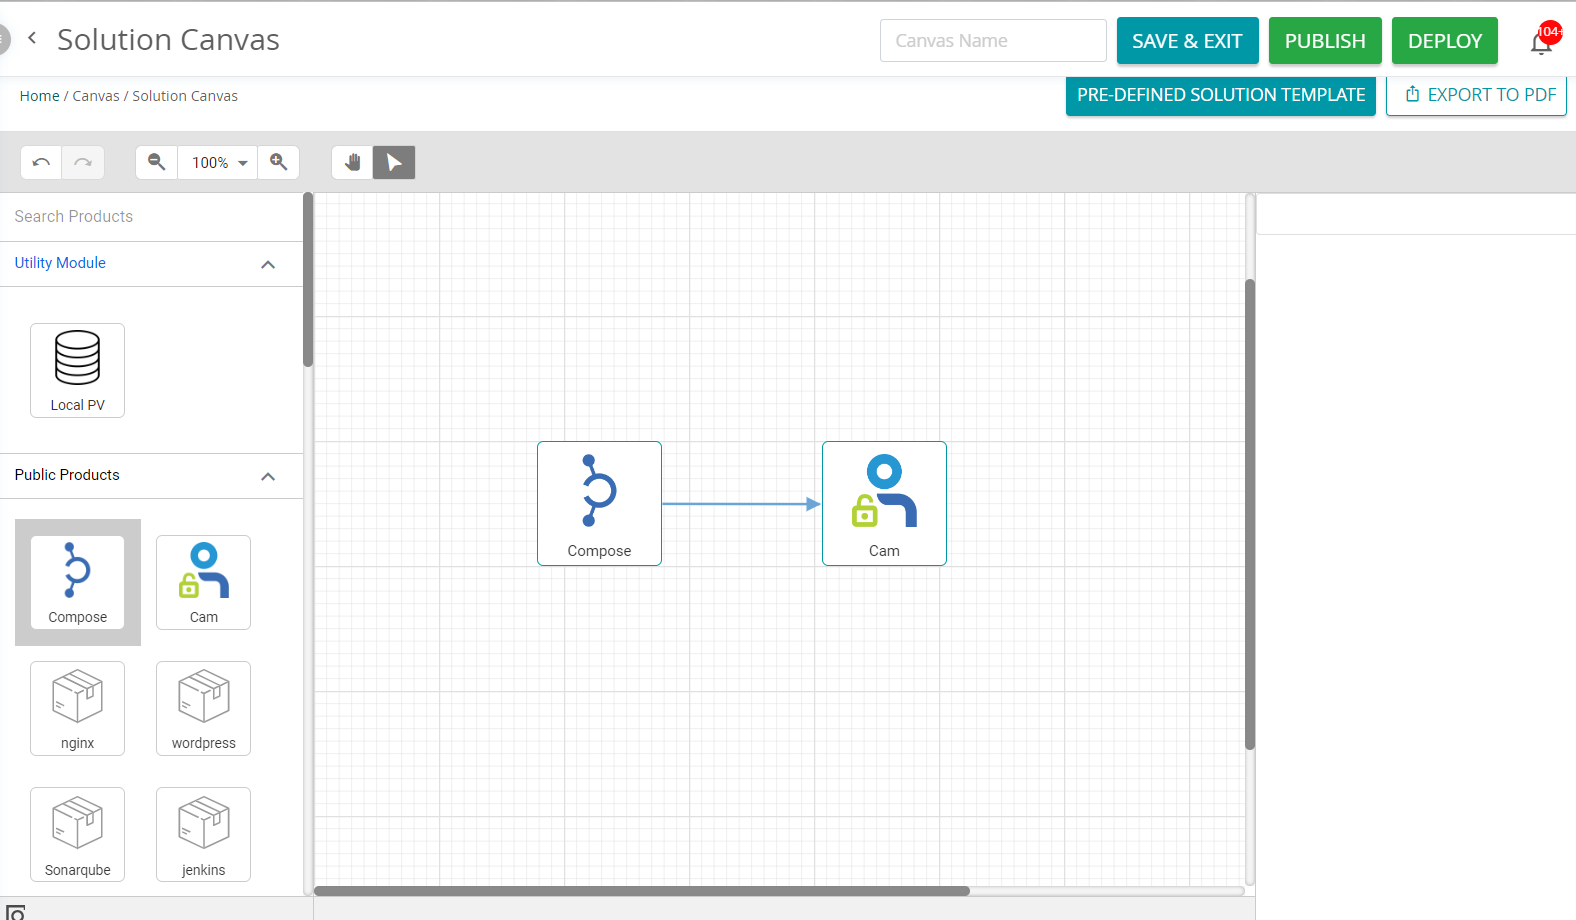
1. Drag and drop the required products from the available products section.
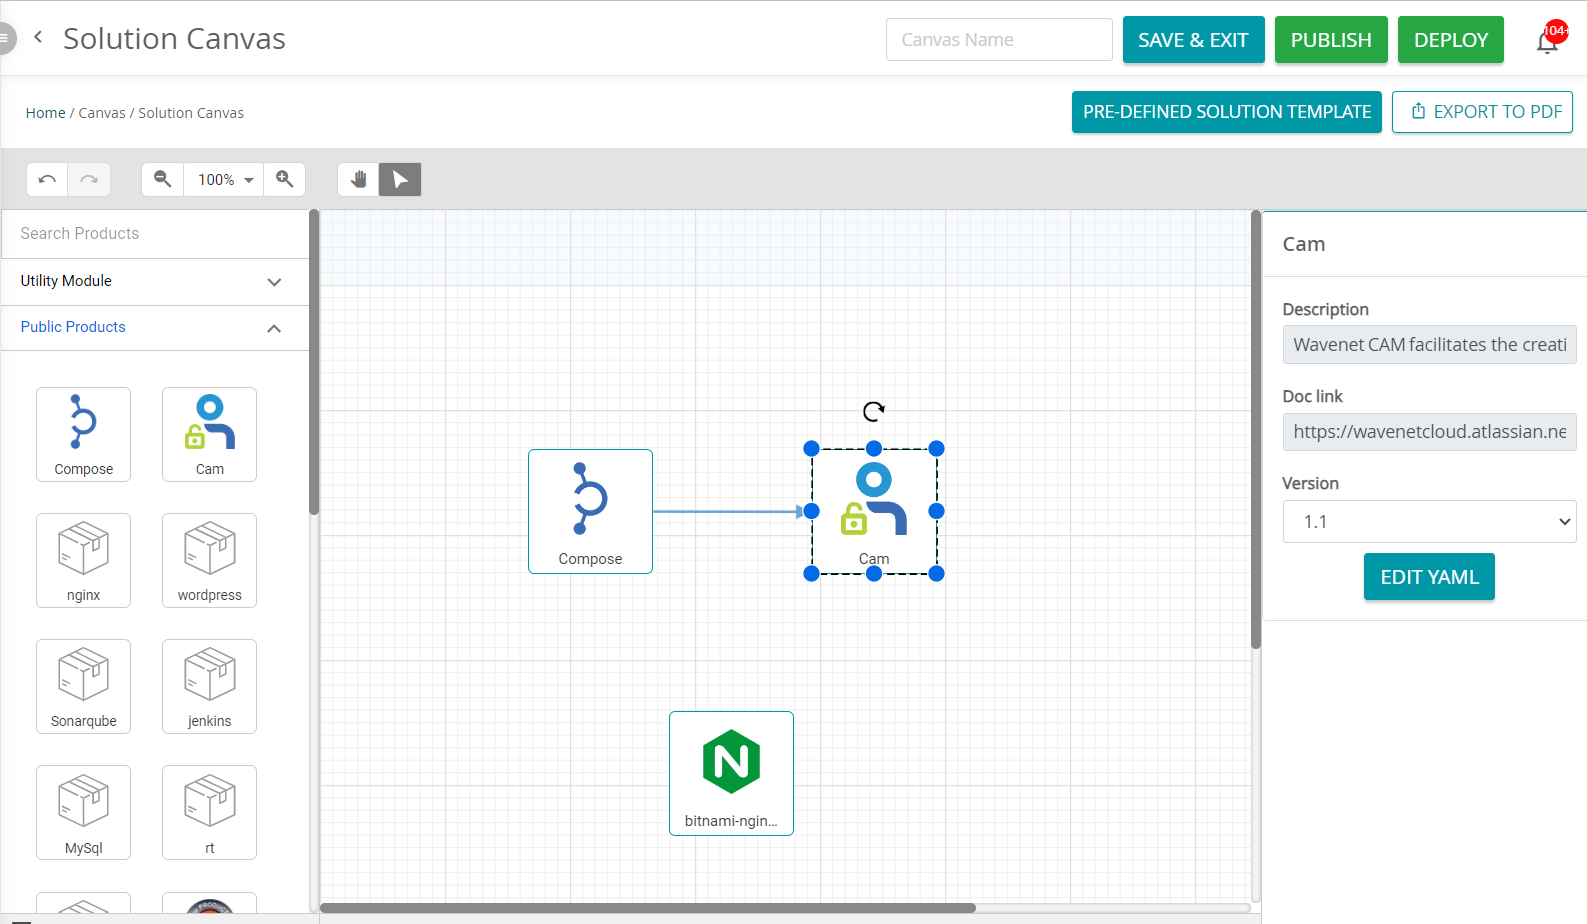
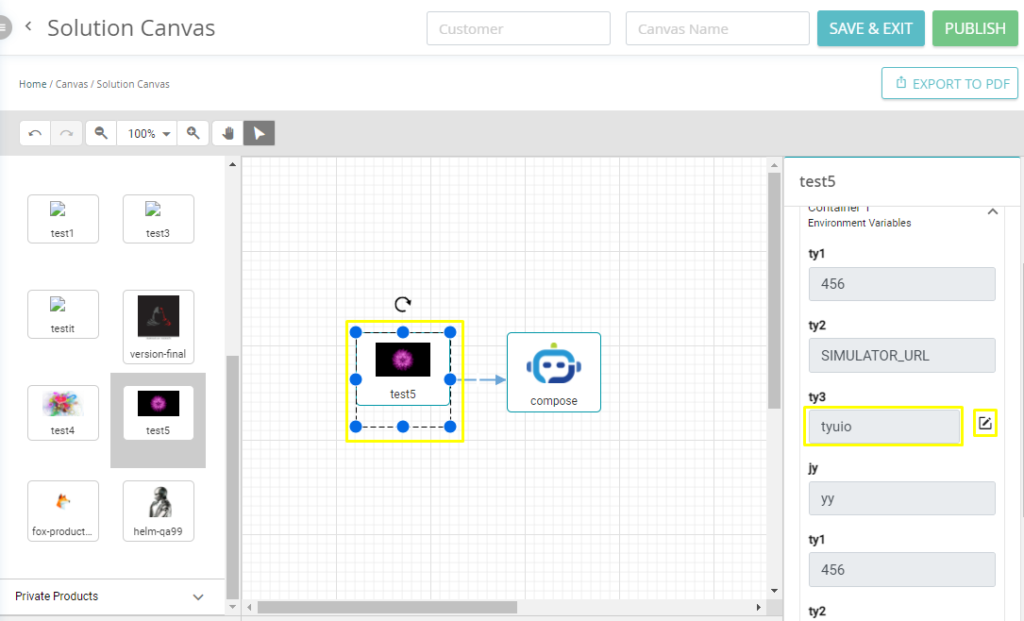
2. Click on a product and add/change the required product properties in the product properties section.
3. To remove a product from Canvas, click the required product on the work area and press the Delete key.
4. If the Environment Variables created during the product version creation were marked as Read-Only, then the user will not be able to override those variables in the Canvas properties section.
5. If the Environment Variables created during the product version creation were NOT marked as Read-Only, then the user will be able to override those variables in the Canvas properties section by clicking on the update icon of that variable.
9.1.2 Creating and Removing Connections Between Products #
1. Click on the canvas, and drag from the small square of the product to the other product which needs to be connected (The connection originates from the first product to the second product).
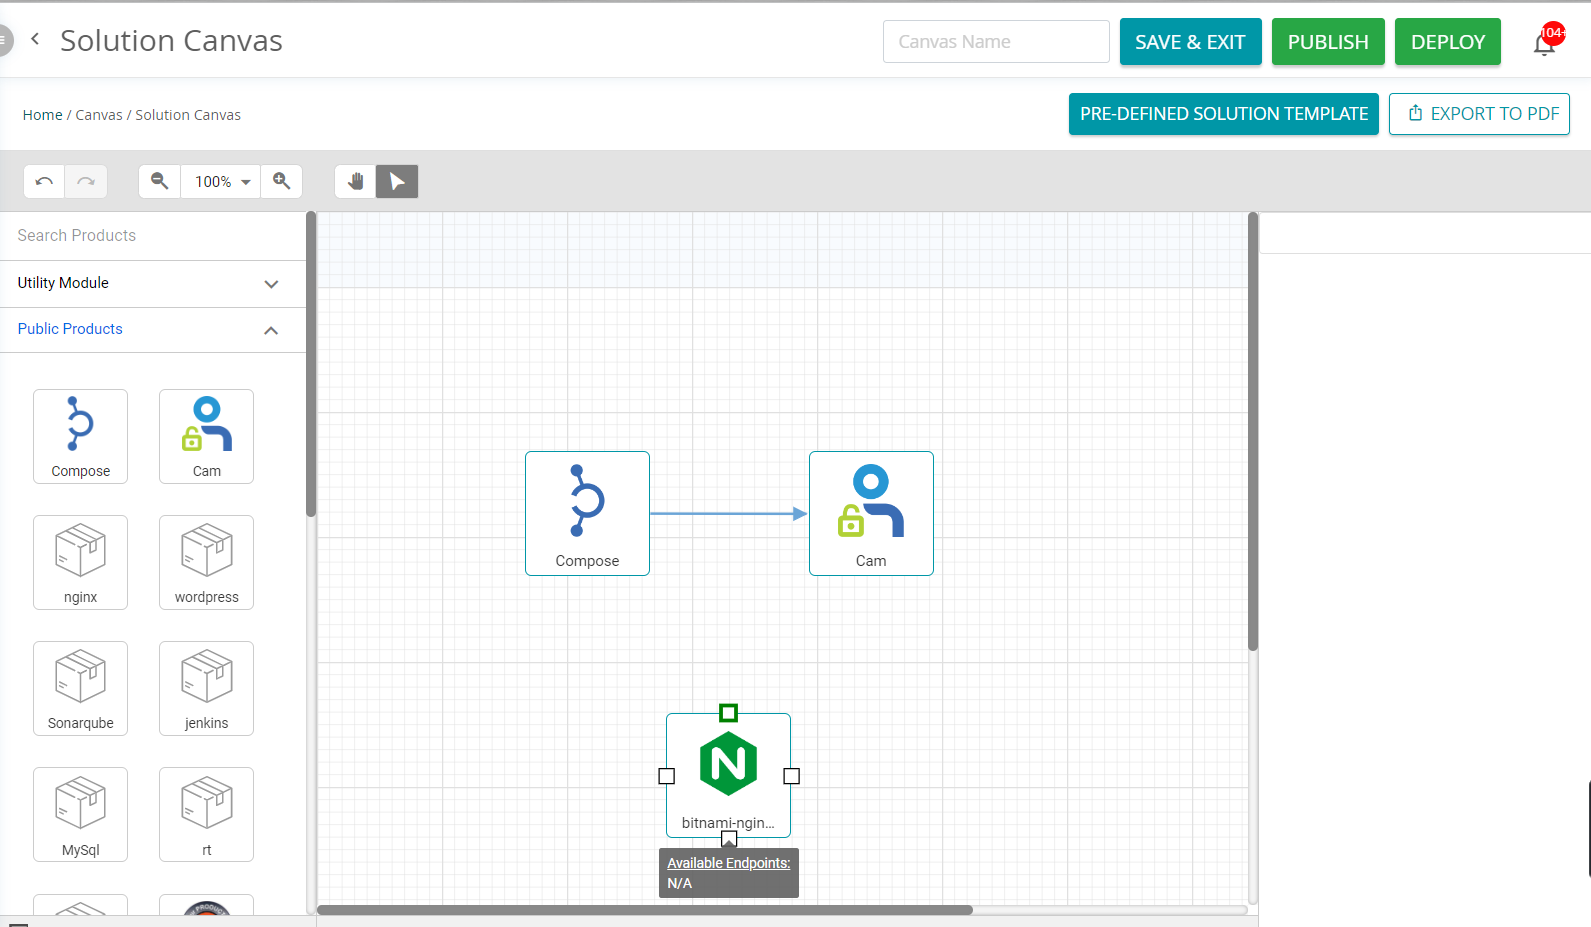
2. The blue line denotes a valid connection and the red line denotes an invalid connection.

3. To remove a connection, click the connection and press the Delete key.
9.1.3 Adding Integrations Between Products #

| 1. The integration can only be added if the products have integrations created during the creation of the product. Refer Products to know more about product onboarding and management. 2. Integrations differ between HELM and NON-HELM Products. |
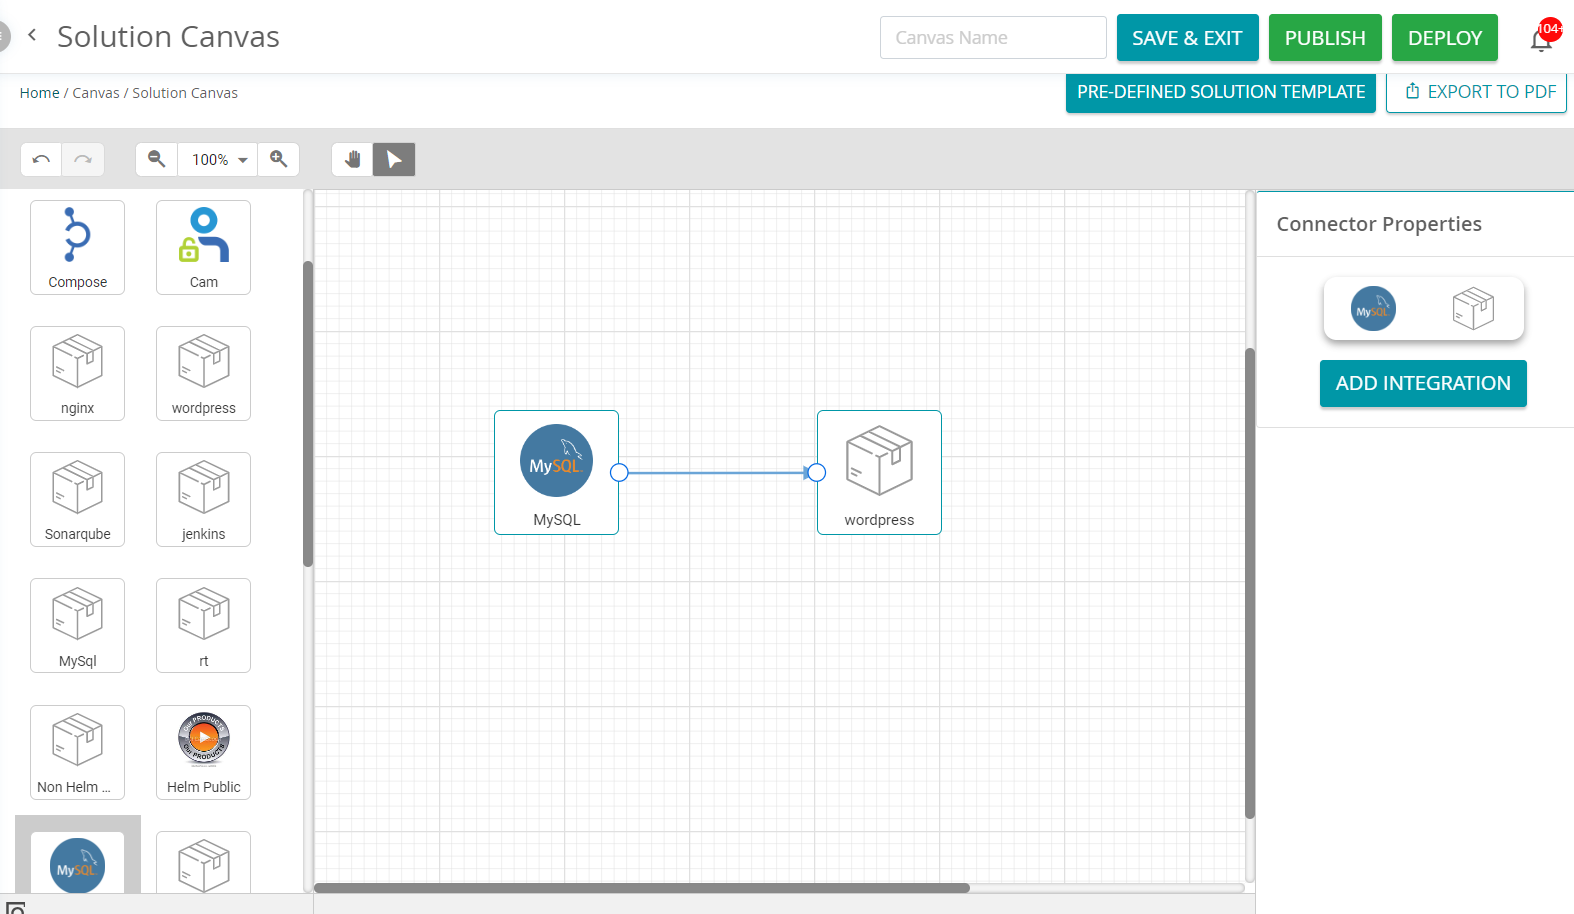
1. Drag and drop the required product from the available products section.
2. Select the Connector and click Add Integration.
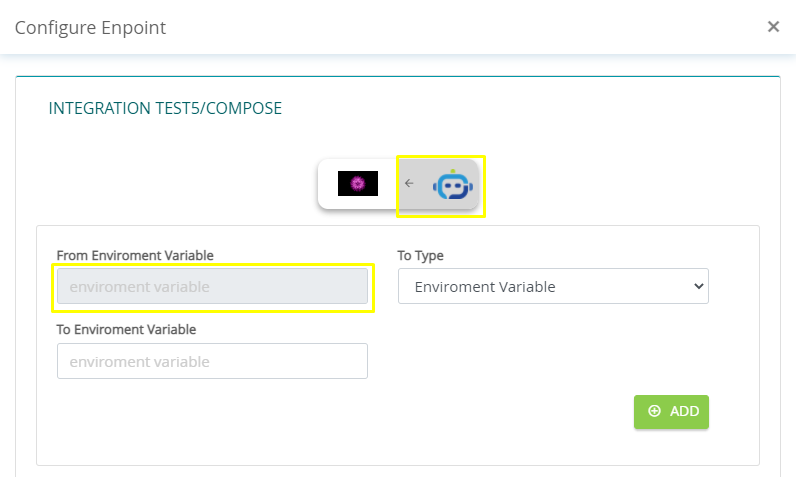
3. Fill in the following information.
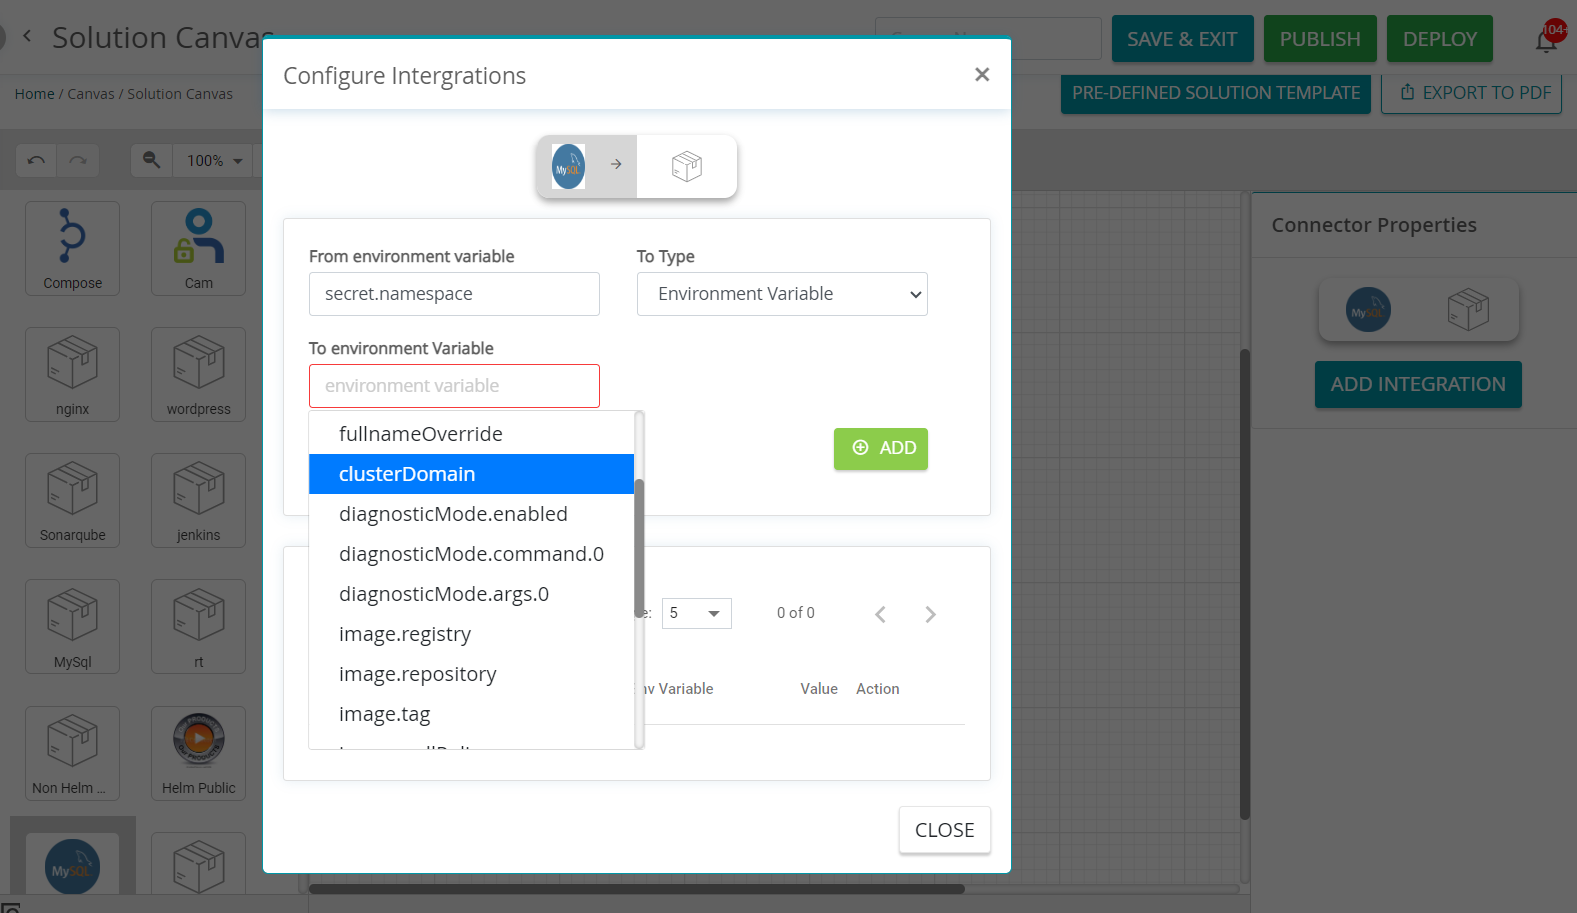
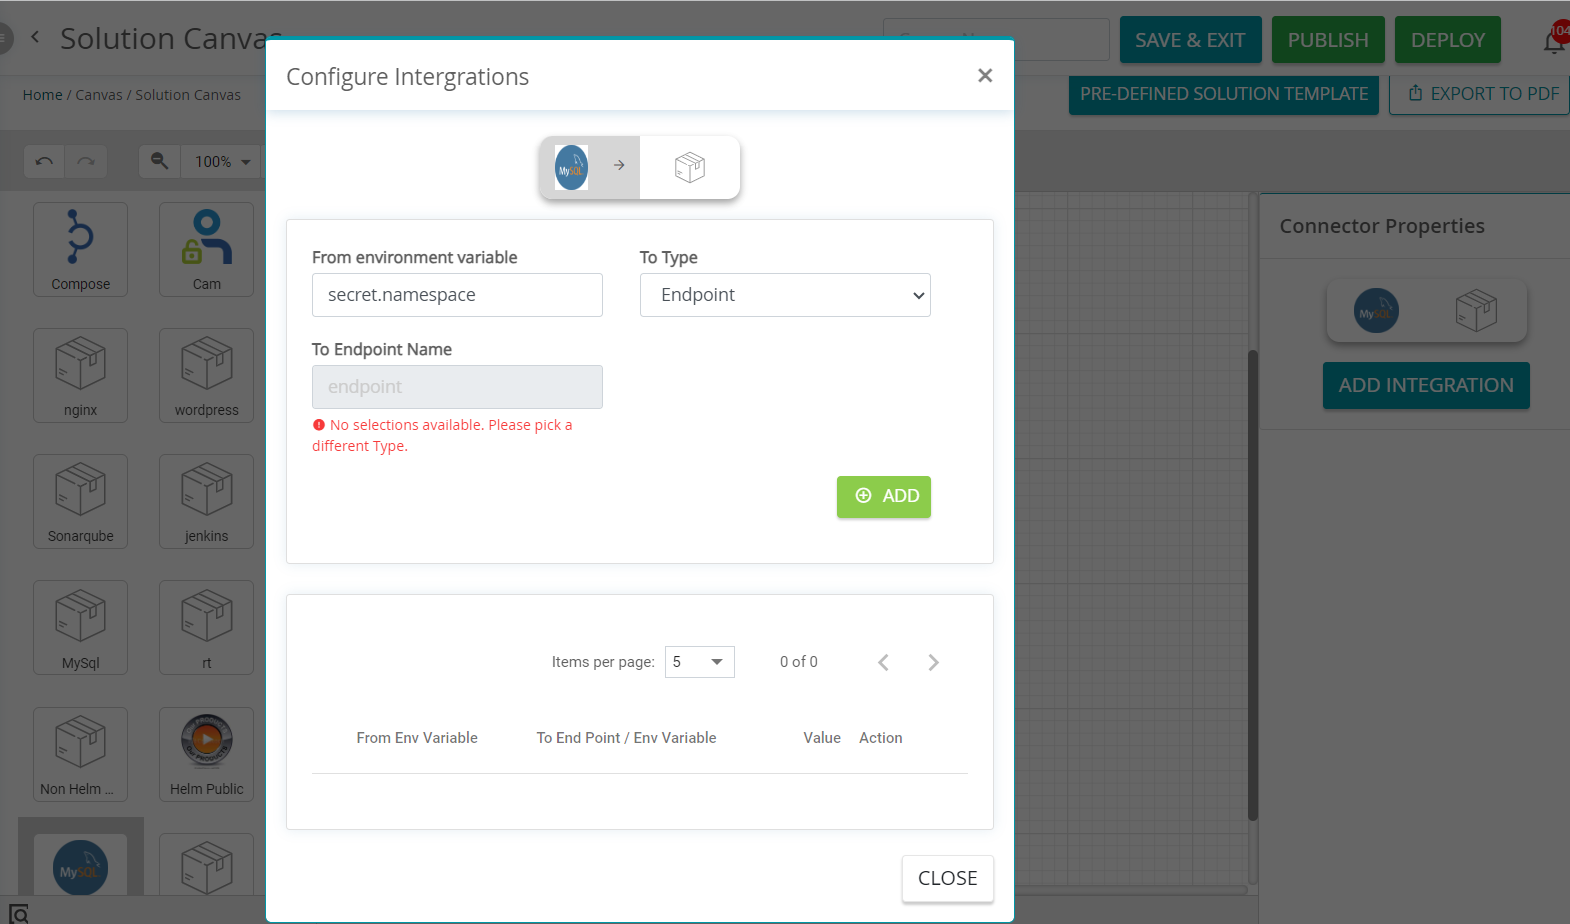
- Expand Integration Header (here, Integration test5/Compose).
- Select the Product from the two.
- Select the From Environment Variable.
- Select the To Type.
- If the To Type is Environment Variable, then enter the To Environment Variable.
- If the To Type is Endpoint, then enter the To Endpoint Name.
- Click Add to add the Environment Variable/Endpoint. Multiple Environment Variables/Endpoints can be added.
- From Environment Variable will be disabled if the second product is selected (Refer to the screenshot below).
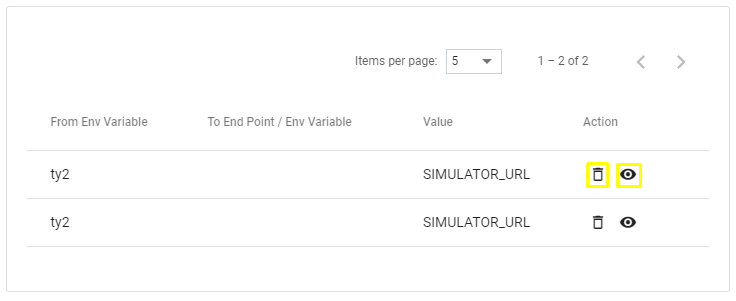
4. Click ![]() Delete to delete the Environment Variable/Endpoint. Click
Delete to delete the Environment Variable/Endpoint. Click ![]() View to view the Environment Variable/Endpoint.
View to view the Environment Variable/Endpoint.
9.1.4 Saving, Publishing, and Exporting Canvas #
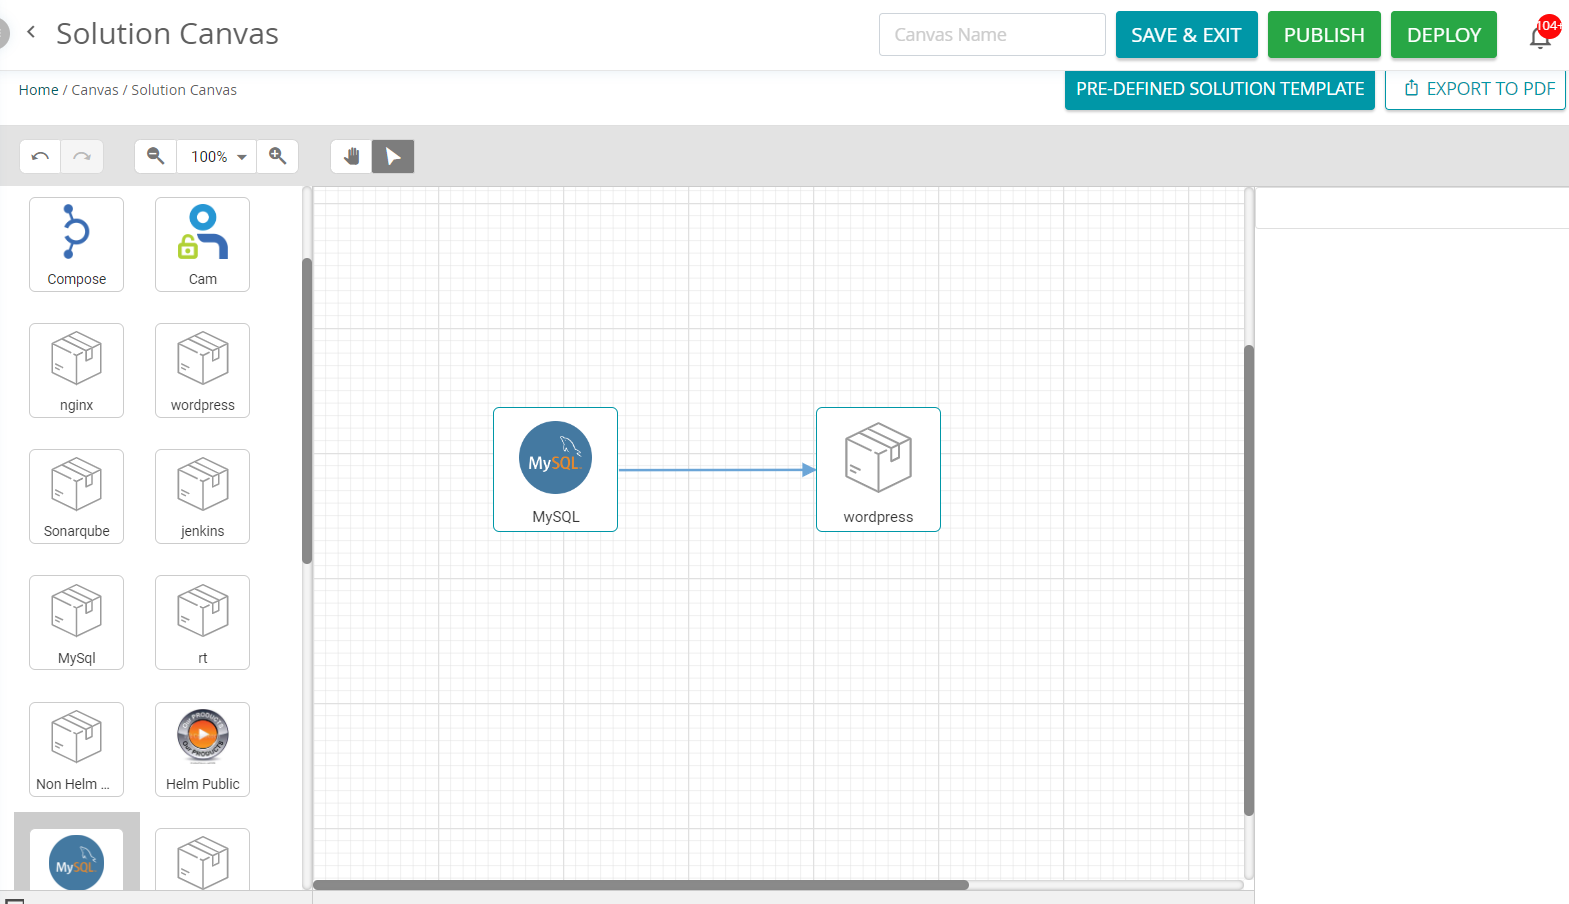
1. Once the canvas has been created with all the products, enter the Canvas Name and click Save & Exit to save the Canvas.
NOTE: When the canvas is saved, it won’t be published for use.
2. Click Publish to publish the canvas for using it,
NOTE: All connections must be valid and all the properties should be assigned before publishing the canvas, When the canvas is published, it will be published for use.
Once the canvas is published successfully a small window will appear as below.
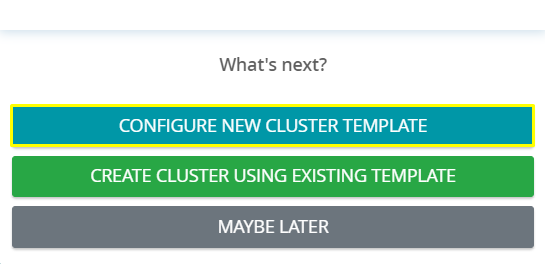
3. Click Configure new cluster template. This will navigate to New cluster template configuration page. https://ahasa.io/docs/new-clusters/.
(or)
Click Create cluster using existing template to create a cluster using available template.
(or)
Click Maybe Later to save the canvas and create the cluster later.
4. Click Deploy to deploy the canvas
5. Click Export to PDF to export the canvas in PDF format.
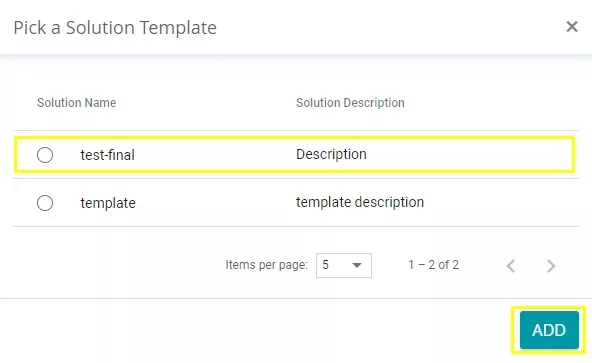
9.1.5 Using Pre-defined Solution Template #
1. You can use a pre-defined template to create a solution. To use a pre-defined template click Pre-defined Solution Template.
2. Select the required Solution Template and click Add.