You can onboard your own products using the product onboarding section. Once onboarded, the products can then be versioned and published for use.
There are two types of product onboarding available in ahasa.
- Internal Product – These products are fully developed and owned by the users and have the whole codebase within the users’ environment.
- 3rd Party Reference – 3rd Party Reference products are external containerized products that are not developed or owned by the user but are required to create a direct reference to fulfill a particular business requirement.
7.1.1 Onboarding Internal Product #
Internal Products are containerized products developed and owned by the user.
7.1.1.1 Onboarding Internal Product (without Helm Repository) #
1. Login to Ahasa.
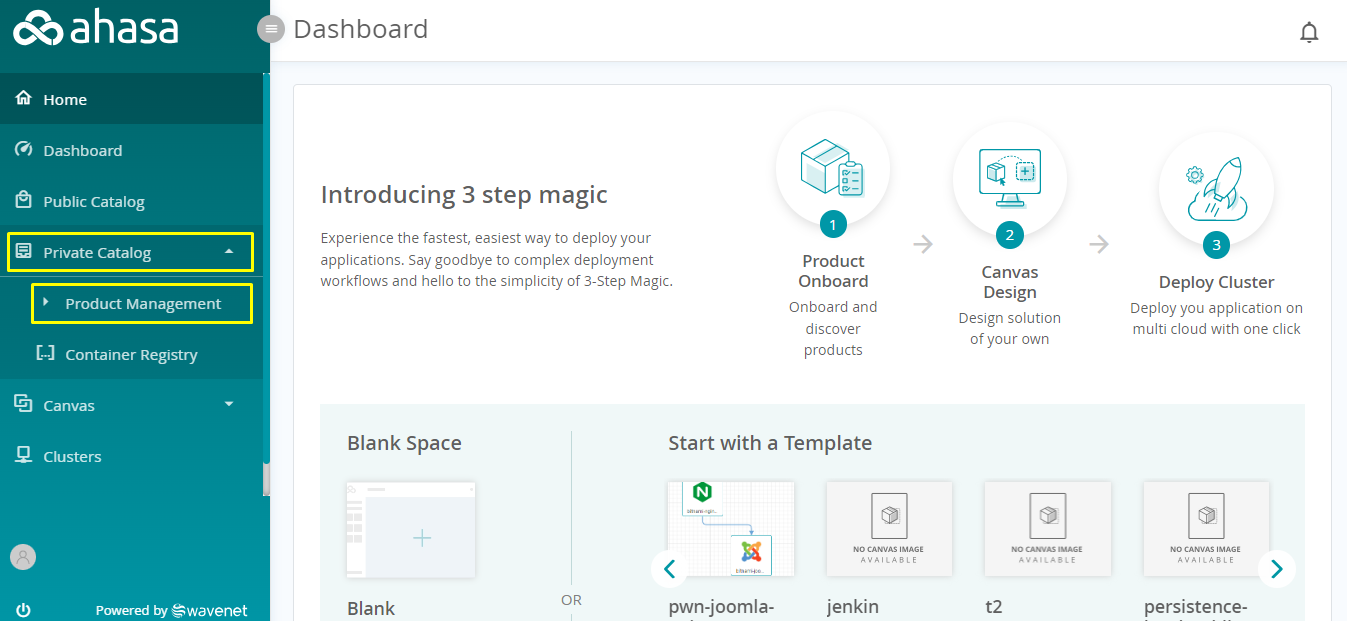
2. On the Left Pane, expand Private Catalog and click Product Management.
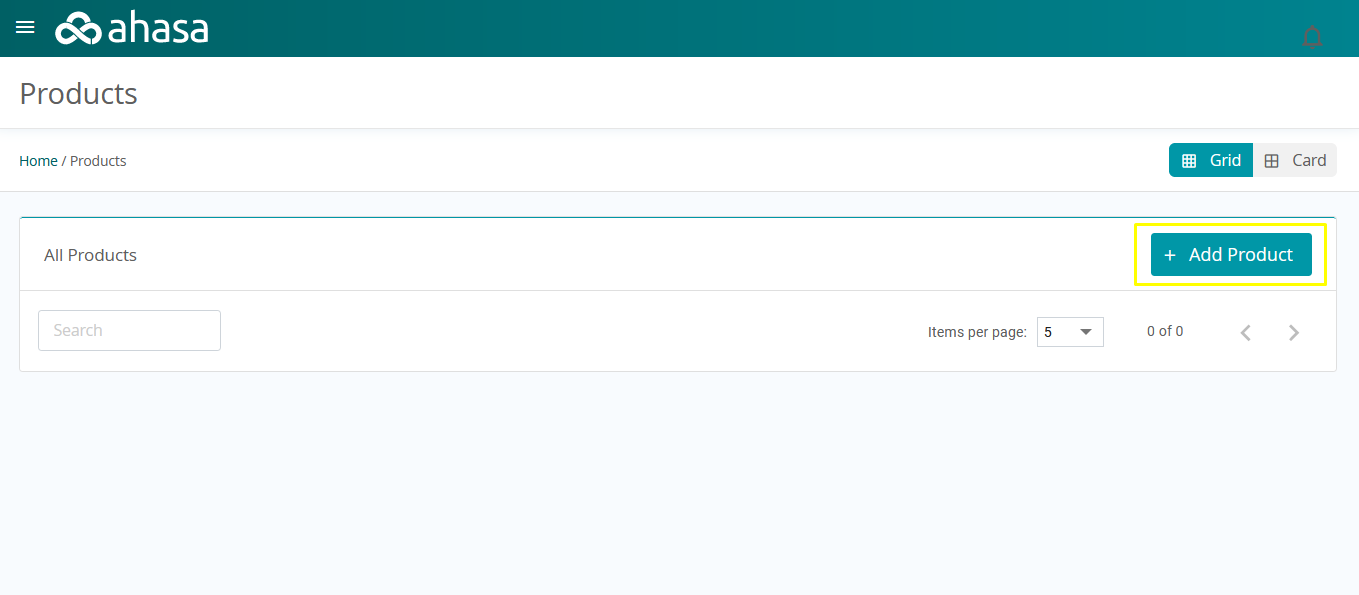
3. Click Add Product.
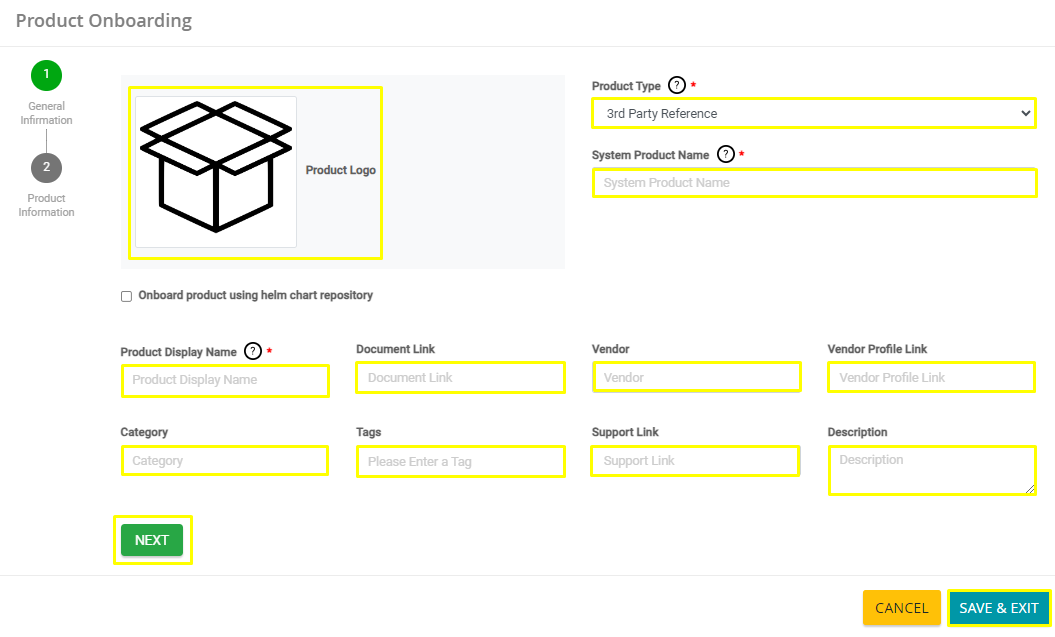
4. Fill the following General Information.
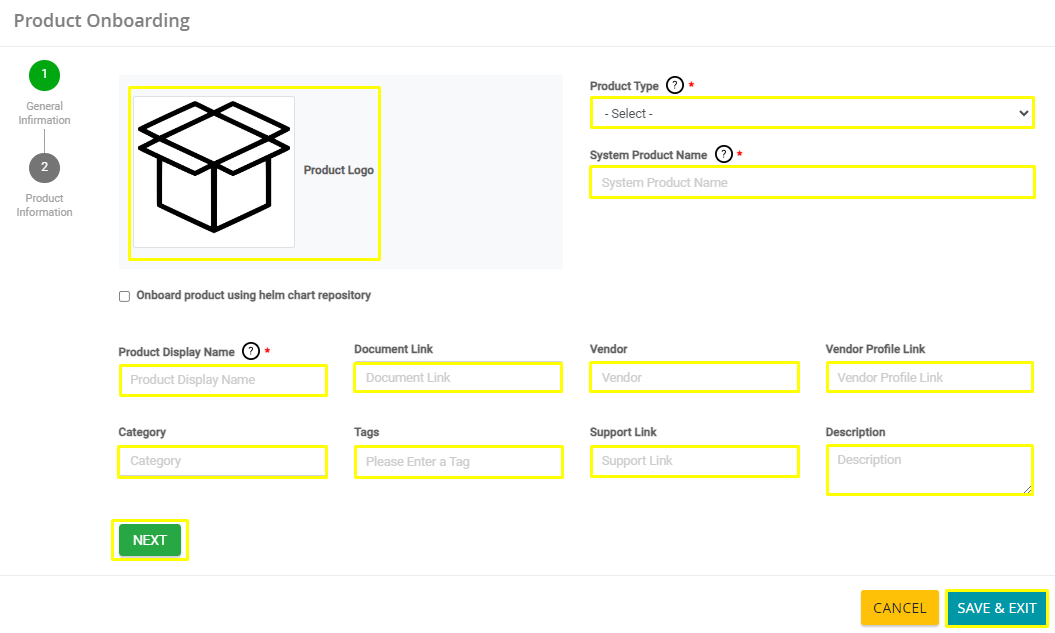
- Unselect Onboard product using the helm chart repository.
- Product Type – Select Internal Product as the Product Type.
- System Product Name – Enter the Product Name for the System. This name will be used by the ahasa system for internal references.
- Product Display Name – Enter the name which needs to be displayed on the UI. This name will be shown in the Solution Canvas.
- Document Link (Optional) – Enter the Document Link. Product-related documents can be linked using this link. Must be a URL
- Vendor (Optional) – Enter the Vendor Name. This is the name of the company which owns the product.
- Vendor Profile Link (Optional) – Enter the link to the Vendor Profile. This is typically linked to the ‘about us’ page of the vendor. Must be a URL
- Category (Optional) – Select the Product Category.
- Tags (Optional) – Enter the relevant tags which are related to the product. The tags can then be used to search and filter the products.
- Support Link (Optional) – Enter the link to the product support page like the contact us page. Product-based support can be provided here. Must be a URL
- Description (Optional) – Enter the Product Description (Max. 500 chars).
- Hover over the Product Logo and click the Camera icon to upload a Product Logo.
5. Click Next.
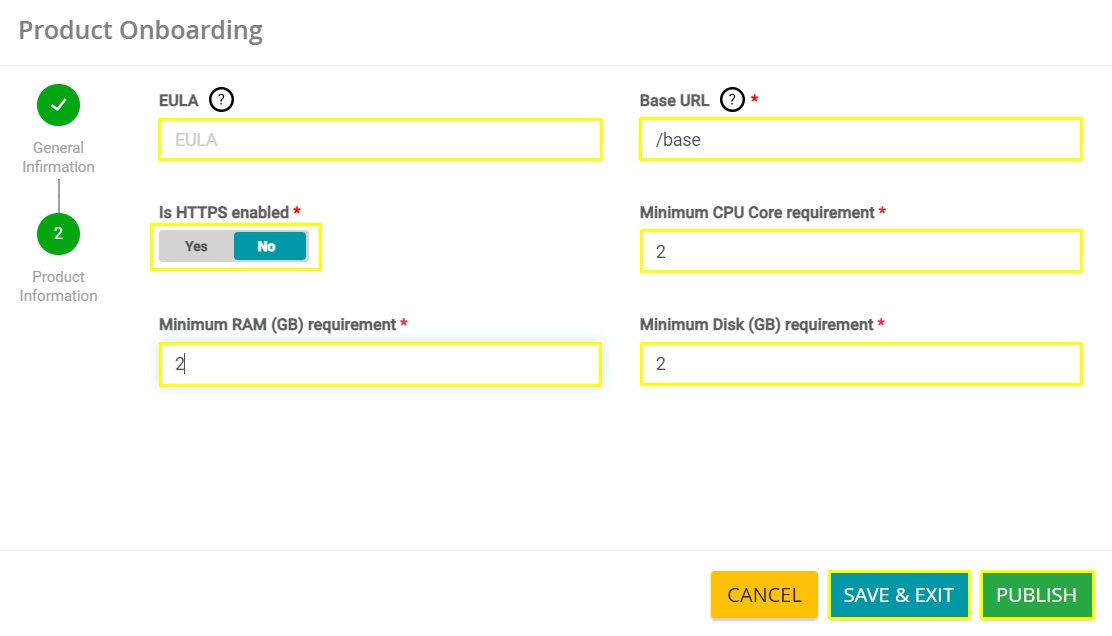
6. Fill in the following Product Information.

- EULA (Optional) – Enter the link to the Product End User License Agreement.
- Base URL – Enter the Base URL of the product. This will be the URL the product will be opened on for the user to log in after the cluster deployment is completed. If the application path is defined using the default root path, enter ‘/’. If the application is running on a specifically defined path, add the required path of that location (Ex:/abc_product/login).
- Enable or Disable HTTPS as per the requirement,
- Minimum CPU Core Requirement – Enter the number of CPU Cores which is required for the product functionality.
- Minimum RAM Requirement – Enter the RAM/Memory (in GBs) which is required for the product functionality.
- Minimum Disk Requirement – Enter the Storage/Disk (in GBs) which is required for the product functionality.
7. Click Save & Exit to save the product and exit the wizard.
8. Click Cancel to cancel the product onboarding.
9. Click Publish to publish the product (only displayed once all mandatory fields are filled). Once the product is onboarded successfully a small window will appear as below displaying “Product Onboarded successfully” message
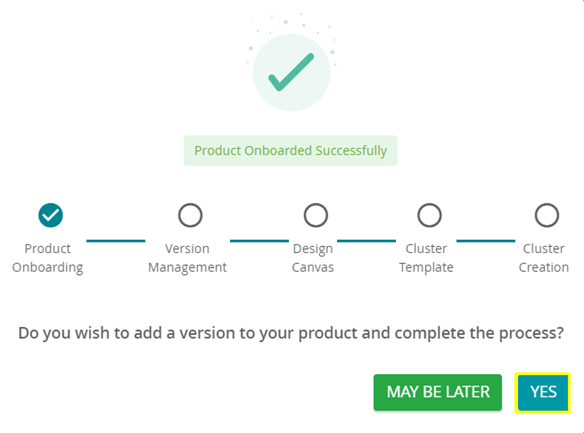
10. Click May be later to cancel to go next step or click Yes to go next step. This will navigate to the Version Onboarding page. https://ahasa.io/docs/7-6-product-version-management/
7.1.1.2 Onboarding Internal Product (with Helm Repository) #
1. Login to Ahasa.
2. On the Left Pane, expand Private catalog and click Product management.
3. Click Add Product
4. Enable Onboard product using helm chart repository checkbox. A popup will be displayed. Fill the following Information.
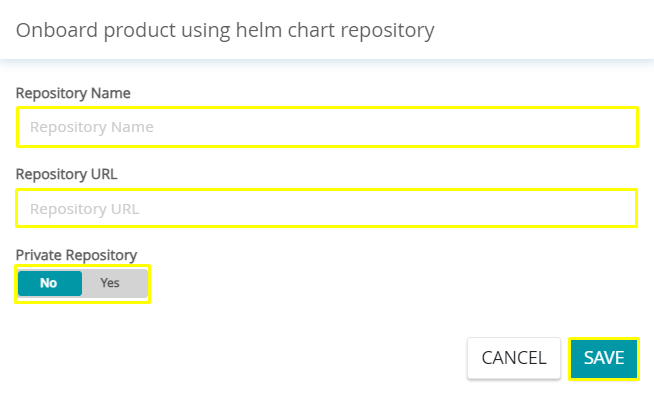
- Repository Name – Enter the Repository Name. This is the name of the HELM repository.
- Repository URL – Enter the URL of the repository. This is the URL of the HELM repository.
- Enable Private Repository if your helm repository is private and is validated with password access.
- If enabled enter the Username and Password for the repository.
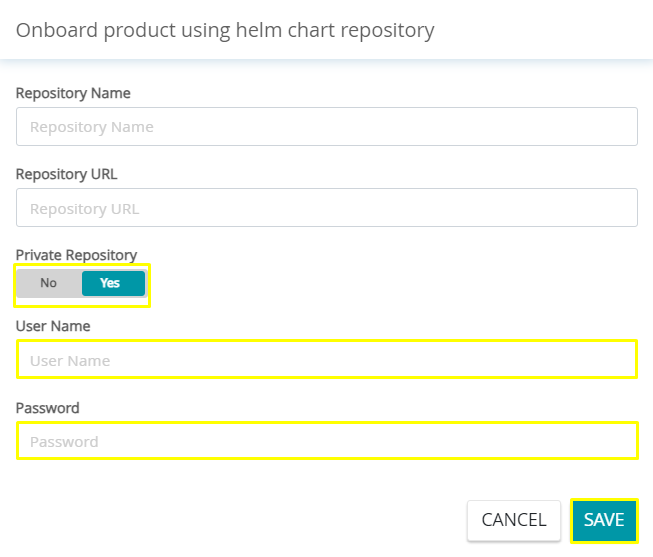
- Click Save.
5. Fill in the following General Information.

- Product Type – Select Internal Product as the Product Type.
- System Product Name – Enter the Product Name for the System. This name will be used by the ahasa system for internal references.
- Product Display Name – Enter the name which needs to be displayed on the UI. This name will be displayed in the Solution Canvas.
- Description (Optional) – Enter the Product Description.(Max. 100 Chars).
- Document Link (Optional) – Enter the Document Link. Product-related documents can be linked using this link. Must be a URL
- Category (Optional) – Select the Product Category.
- Tags (Optional) – Enter the relevant tags which are related to the product. The tags can then be used to search and filter the products.
- Vendor (Optional) – Enter the Vendor Name. This is the name of the company which owns the product.
- Vendor Profile Link (Optional) – Enter the link to the Vendor Profile. This is typically linked to the ‘about us’ page of the vendor. Must be a URL
- Support Link (Optional) – Enter the link to the product support page like the contact us page. Product-based support can be provided here.
- Hover over the Product Logo and click the Camera icon to upload a Product Logo.
- Click Edit to edit the Helm Information.
6. Click Next.
7. Fill in the following Product Information
- EULA (Optional) – Enter the link to the Product End User License Agreement.
- Base URL – Enter the Base URL of the product.
- Enable or Disable HTTPS as per the requirement,
- Minimum CPU Core Requirement – Enter the number of CPU Cores which is required for the product functionality.
- Minimum RAM Requirement – Enter the RAM/Memory (in GBs) which is required for the product functionality.
- Minimum Disk Requirement – Enter the Storage/Disk (in GBs) which is required for the product functionality.
8. Click Save & Exit to save the product and exit the wizard.
9. Click Cancel to cancel the product onboarding.
10. Click Publish to publish the product (only displayed once all mandatory fields are filled). Once the product is onboarded successfully a small window will appear as below displaying “Product Onboarded successfully” message
11. Click May be later to cancel to go next step or click Yes to go next step. This will navigate to the Version Onboarding page. https://ahasa.io/docs/7-6-product-version-management/
7.1.2 Onboarding 3rd Party Reference #
3rd Party Reference products are external containerized products that are not developed or owned by the user but are required to create a direct reference to fulfill a particular business requirement.
7.1.2.1 Onboarding 3rd Party Reference (without Helm Repository) #
1. Login to Ahasa.
2. On the Left Pane, expand Private Catalog and click Product Management.

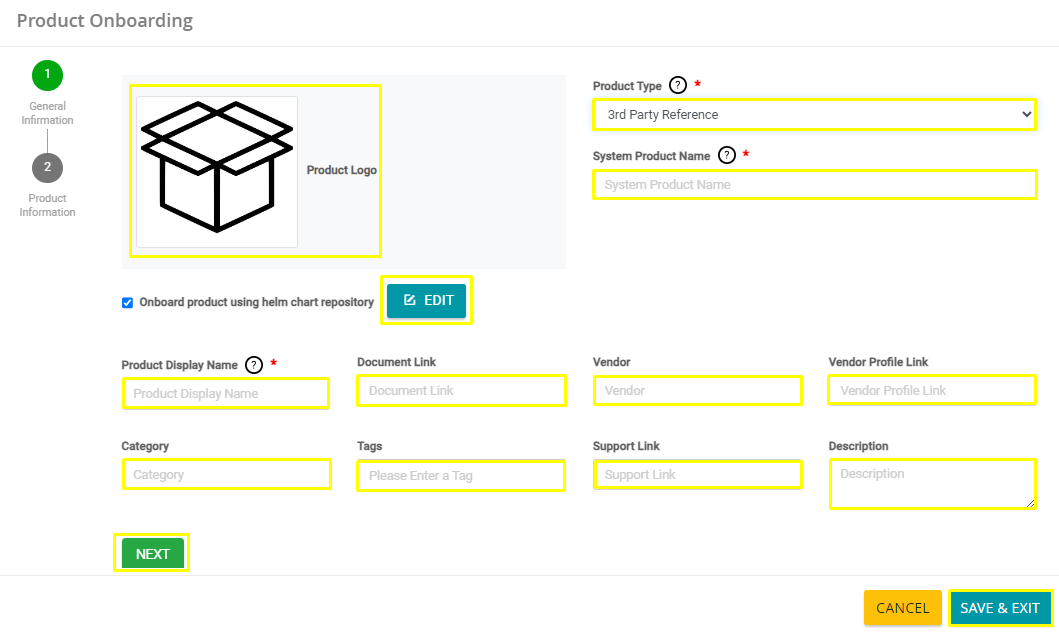
3. Click Add product and Fill the following General Information.
- Unselect Onboard product using the helm chart repository.
- Product Type – Select 3rd Party Reference as the Product Type.
- System Product Name – Enter the Product Name for the system. This name will be used by the ahasa system for internal references.
- Product Display Name – Enter the name which needs to be displayed on the UI. This name will be shown in the Solution Canvas.
- Document Link (Optional) – Enter the Document Link. Product-related documents can be linked using this link. Must be a URL
- Vendor (Optional) – Enter the Vendor Name. This is the name of the company which owns the product.
- Vendor Profile Link (Optional) – Enter the link to the Vendor Profile. This is typically linked to the ‘about us’ page of the vendor. Must be a URL
- Category (Optional) – Select the Product Category.
- Tags (Optional) – Enter the relevant tags which are related to the product. The tags can then be used to search and filter the products.
- Support Link (Optional) – Enter the link to the product support page like the contact us page. Product-based support can be provided here. Must be a URL
- Description (Optional) – Enter the Product Description (Max. 500 chars).
- Hover over the Product Logo and click the Camera icon to upload a Product Logo.
4. Click Next.
5. Fill in the following Product Information.
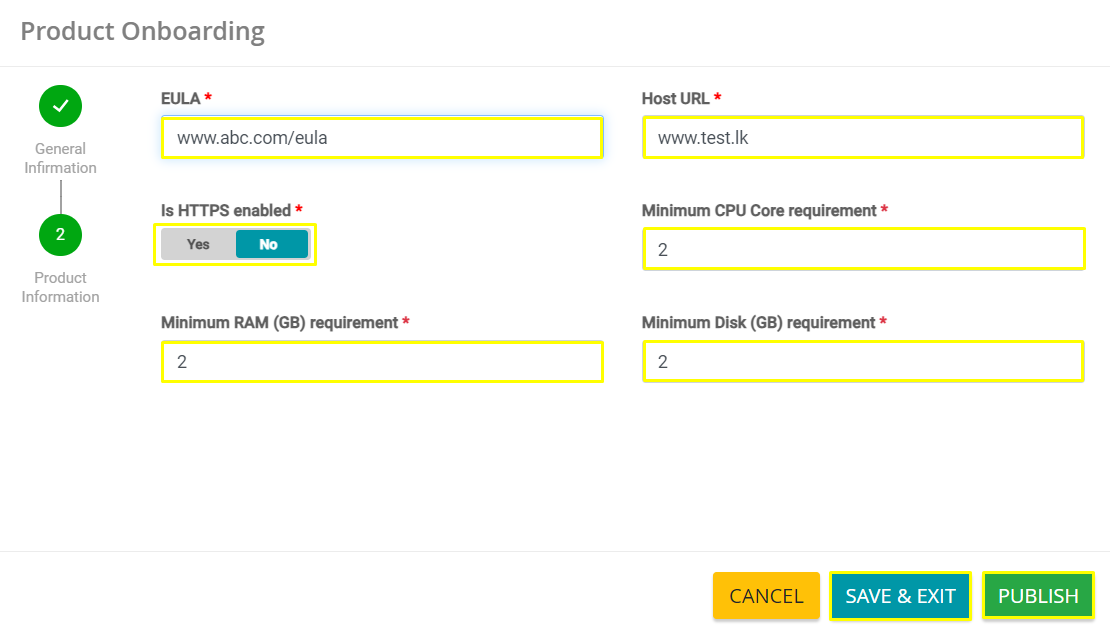
- EULA – Enter the link to the Product End User License Agreement.
- Host URL – Enter the Host URL of the product.
- Enable or Disable HTTPS as per the requirement,
- Minimum CPU Core Requirement – Enter the number of CPU Cores which is required for the product functionality.
- Minimum RAM Requirement – Enter the RAM/Memory (in GBs) which is required for the product functionality.
- Minimum Disk Requirement – Enter the Storage/Disk (in GBs) which is required for the product functionality.
6. Click Save & Exit to save the product and exit the wizard.
7. Click Cancel to cancel the product onboarding.
8. Click Publish to publish the product (only displayed once all mandatory fields are filled). Once the product is onboarded successfully a small window will appear as below displaying “Product Onboarded successfully” message
9. Click May be later to cancel to go next step or click Yes to go next step. This will navigate to the Version Onboarding page. https://ahasa.io/docs/7-6-product-version-management/
7.1.2.2 Onboarding 3rd Party Reference (with Helm Repository) #
1. Login to Ahasa.
2. On the Left Pane, expand Private Catalog and click Product Onboarding.
3. Click Add product.
3. Enable Onboard product using helm chart repository. A popup will be displayed. Fill the following Information.
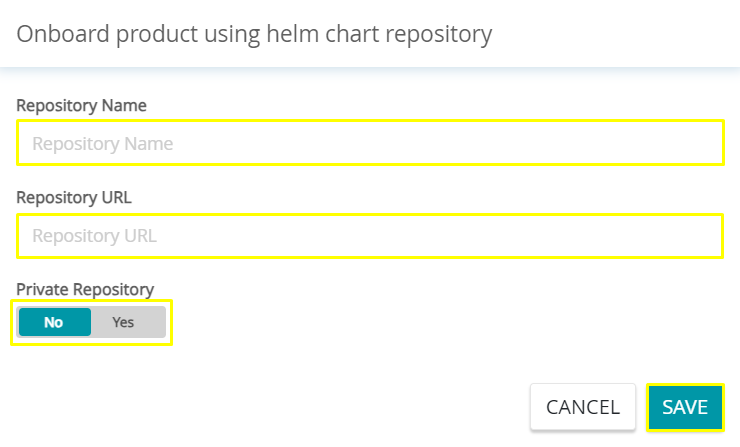
- Repository Name – Enter the Repository Name. This is the name of the HELM repository.
- Repository URL – Enter the URL of the repository. This is the URL of the HELM repository.
- Enable Private Repository if your repository is private and is validated with password access.
- If enabled enter the Username and Password for the repository.

- Click Save
4. Fill in the following General Information.
- Product Type – Select 3rd Party Reference as the Product Type.
- System Product Name – Enter the Product Name for the System. This name will be used by the ahasa system for internal references.
- Product Display Name – Enter the name which needs to be displayed on the UI. This name will be displayed in the Solution Canvas.
- Description (Optional) – Enter the Product Description (Max. 100 Chars).
- Document Link (Optional) – Enter the Document Link. Product-related documents can be linked using this link. Must be a URL
- Category (Optional) – Select the Product Category.
- Tags (Optional) – Enter the relevant tags which are related to the product. The tags can then be used to search and filter the products.
- Vendor (Optional) – Enter the Vendor Name. This is the name of the company which owns the product.
- Vendor Profile Link (Optional) – Enter the link to the Vendor Profile. This is typically linked to the ‘ábout us’ page of the vendor. Must be a URL
- Support Link (Optional) – Enter the link to the product support page like the contact us page. Product-based support can be provided here. Must be a URL
- Hover over the Product Logo and click the Camera icon to upload a Product Logo.
- Click Edit to edit the Helm Information.
5. Click Next.
6. Fill in the following Product Information.

- EULA – Enter the link to the Product End User License Agreement.
- Host URL – Enter the Host URL of the product.
- Enable or Disable HTTPS as per the requirement,
- Minimum CPU Core Requirement – Enter the number of CPU Cores which is required for the product functionality.
- Minimum RAM Requirement – Enter the RAM/Memory (in GBs) which is required for the product functionality.
- Minimum Disk Requirement – Enter the Storage/Disk (in GBs) which is required for the product functionality.
7. Click Save & Exit to save the product and exit the wizard.
8. Click Cancel to cancel the product onboarding.
9. Click Publish to publish the product (only displayed once all mandatory fields are filled). Once the product is onboarded successfully a small window will appear as below displaying “Product Onboarded successfully” message
10. Click May be later to cancel to go next step or click Yes to go next step. This will navigate to the Version Onboarding page. https://ahasa.io/docs/7-6-product-version-management/


