10.3.1 Creating an On-Prem Cluster Template #
THIS FEATURE IS ONLY AVAILABLE FOR CUSTOMERS WHO HAVE SUBSCRIBED FOR ON-PREM INCLUSIVE PLANS.
1. Login to Ahasa.
2. On the Left Pane, expand Canvas and click Canvas Management.
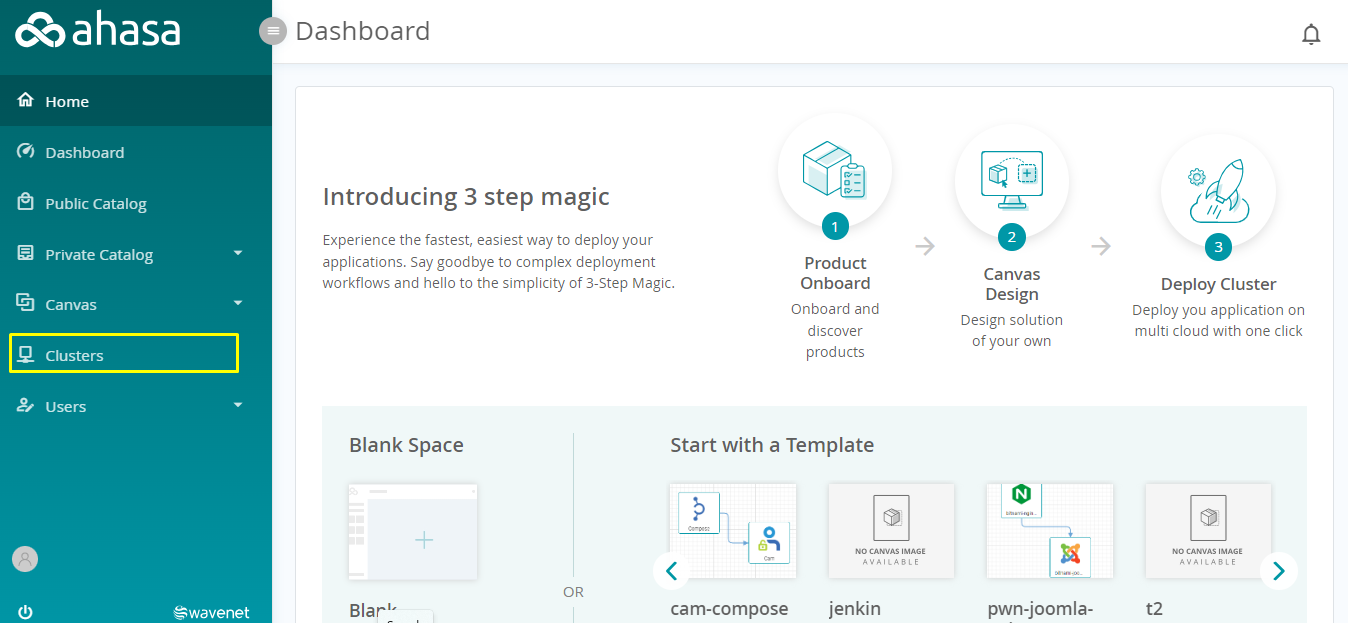
3. Click On-Prem Clusters.

4. Click + Template.
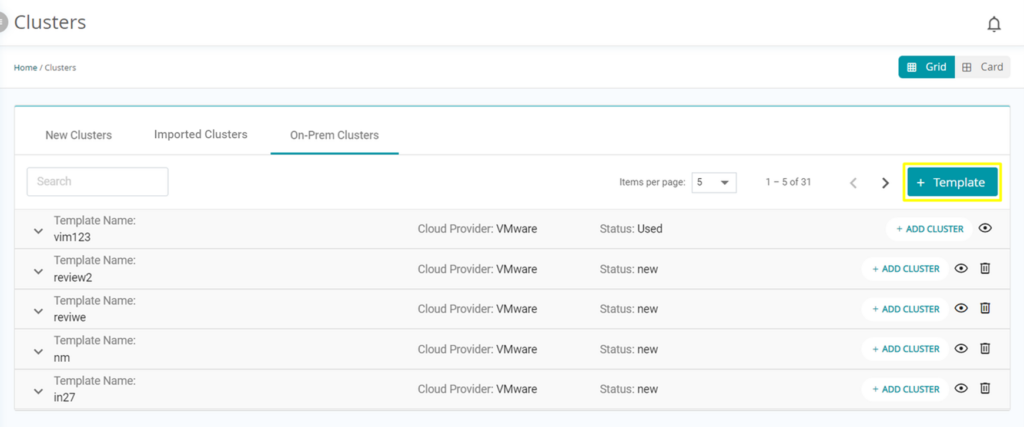
5. Fill the following information.
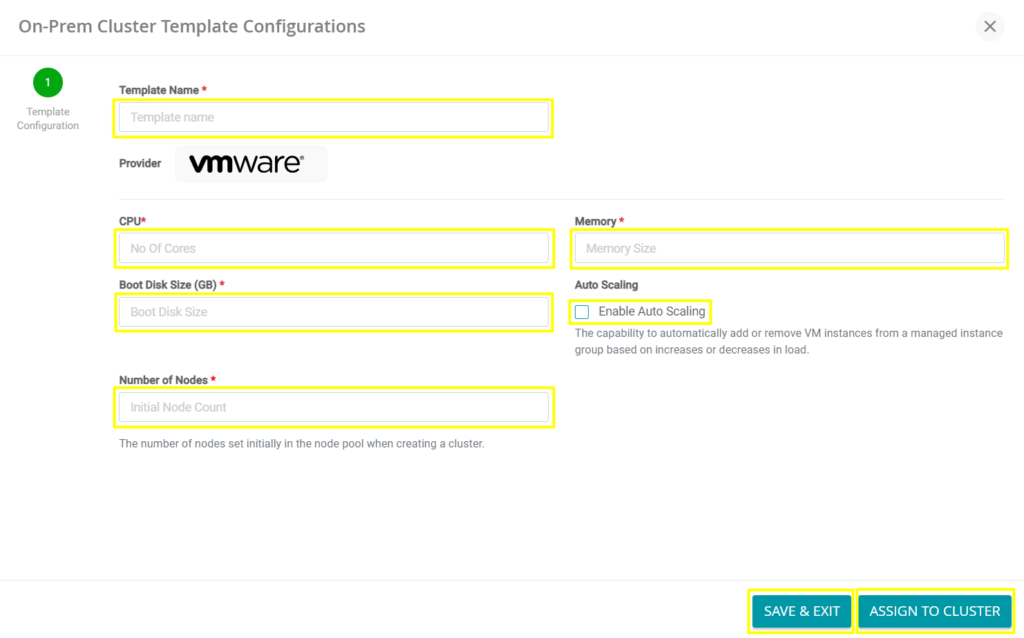
- Template Name – Enter the template name.
- CPU – Enter the number of CPU cores required.
- Memory – Enter the required memory (RAM) size in GBs.
- Boot Disk Size (GB) – Enter the Boot Disk Size (in GBs).
- Number of Nodes – Enter the number of nodes that will be used at the beginning.
- Enable Auto Scaling – Enable this if you want to add or remove VM instances from a managed instance group based on increases or decreases in load.
6. Click Assign to Cluster to create the Cluster Configuration Template. Click Save & Exit to save the draft and exist.
Once Created, an email will be sent to the user’s email address. If a Wavenet Internal Product (Ex: Compose, CAM) is used on the cluster, the login credentials will be sent in that same mail.
10.3.2 Add On-Prem Cluster #
THIS FEATURE IS ONLY AVAILABLE FOR CUSTOMERS WHO HAVE SUBSCRIBED FOR ON-PREM INCLUSIVE PLANS.
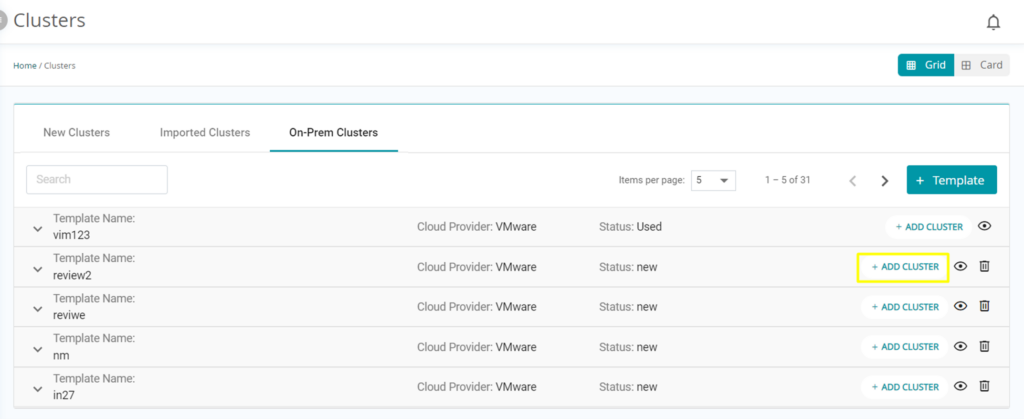
1. Click On-Prem Clusters.

2. On the required Cluster Template, click Add Cluster.
3. Fill in the following information.
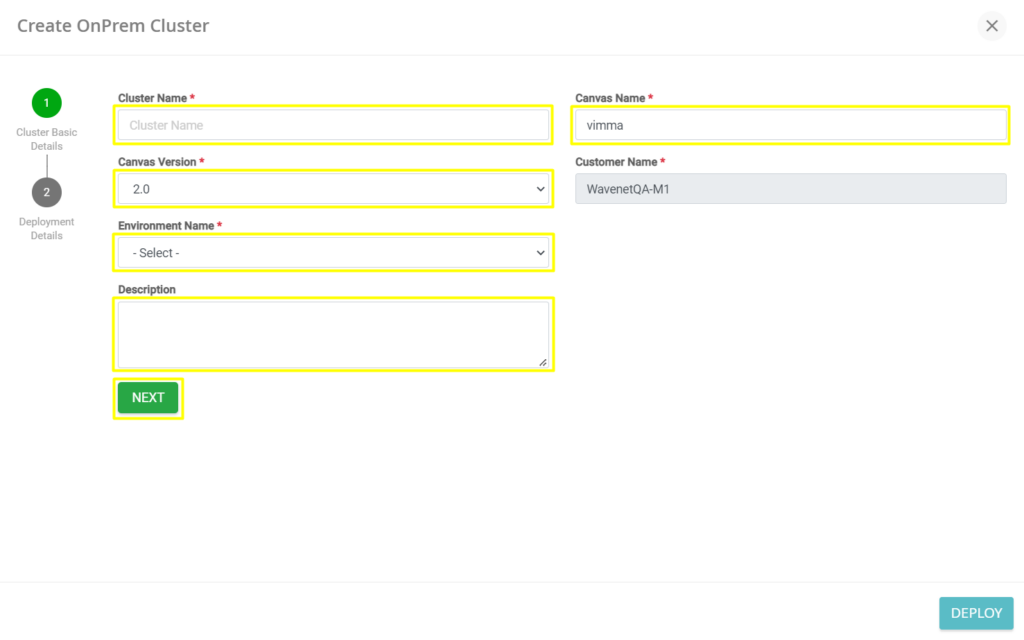
- Cluster Name – The name of the cluster.
- Canvas Name – All your created canvasses will be available on this list. Select the required canvas from the list. Go to this link to know more about managing Canvas.
- Canvas Version – All canvas versions will be displayed for the selected canvas. Select the required canvas version (versions will only be displayed after selecting Canvas Name).
- Environment Name – Select the Environment Name from the list. Staging is used for testing and Production is used for the live production system. (Environment Names will be displayed once the Canvas Version is selected).
- Description – Enter the description of the Cluster.
- Click Next and fill in the following information.
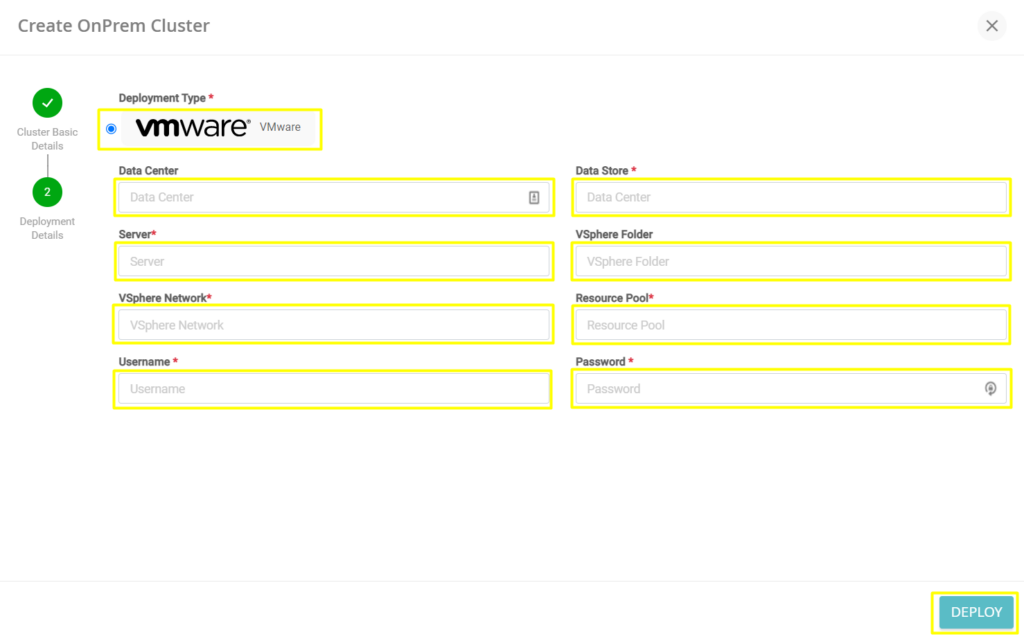
- Select Deployment Type – Select the required Deployment Type as VMware.
- Data Center (Optional) – Enter the data center name.
- Data Store – Enter the data store name.
- Server – Enter the server name/IP.
- vSphere Folder (Optional) – Enter the vSphere folder name.
- vSphere Network – Enter the vSphere network name.
- Resource Pool – Enter the resource pool name.
- Username – Enter the username for the VMware instance.
- Password – Enter the password for the VMware instance.
4. Click Deploy to deploy the Cluster.


