10.2.1 Creating Imported Cluster #
1. Login to Ahasa.
2. On the Left Pane, click Clusters.
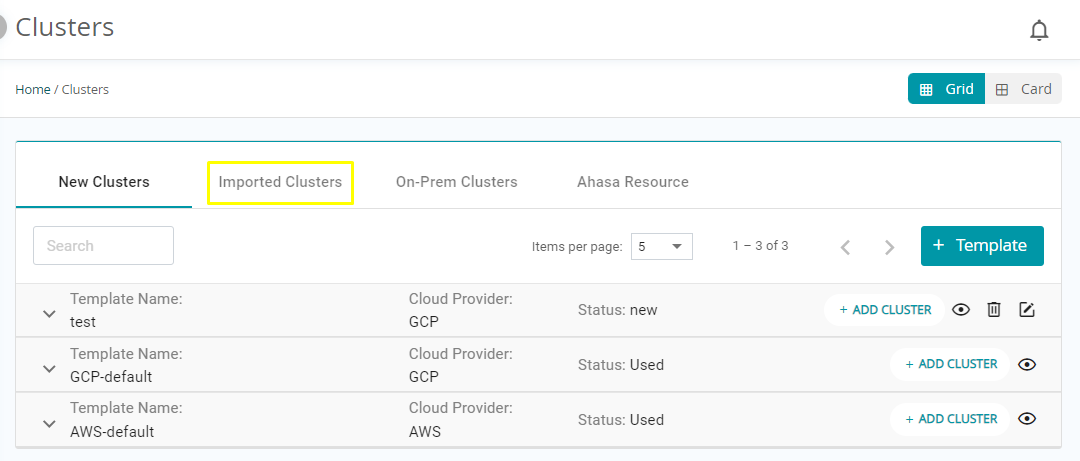
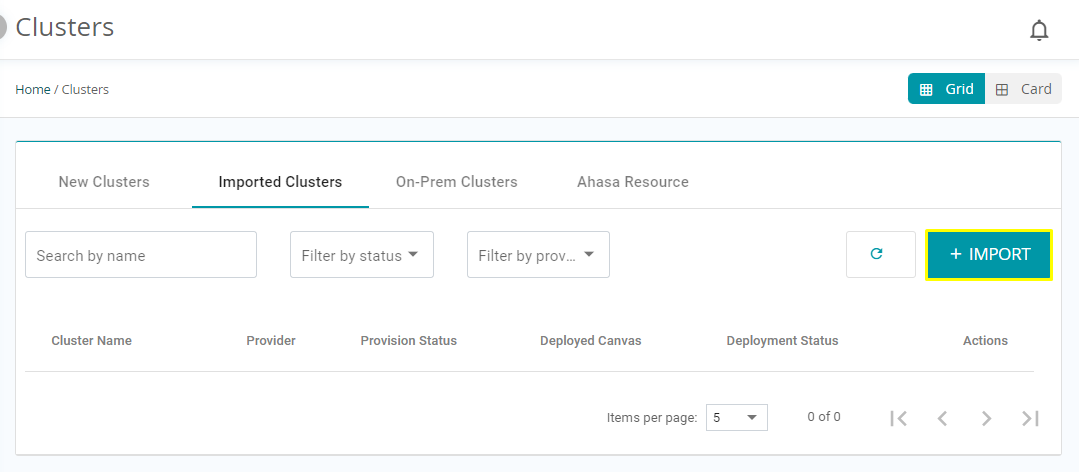
3. Click Imported Clusters.
4. Click IMPORT CLUSTER.
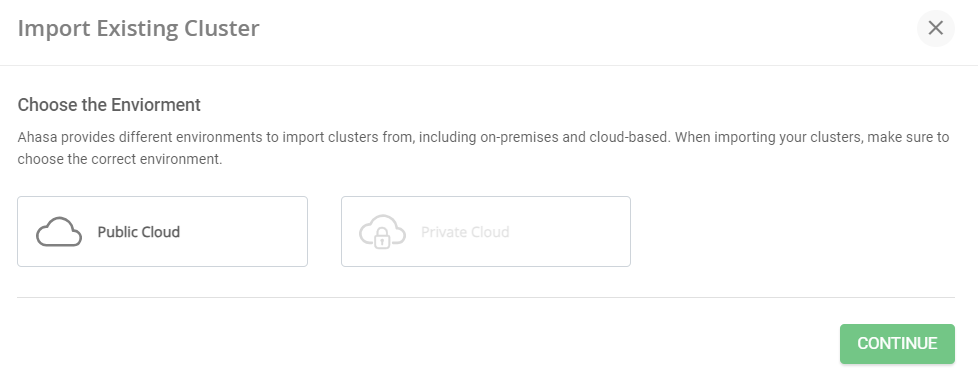
5. Select the environment.
10.2.2 Importing a Cluster from Public Cloud Using Google Kubernetes Engine #
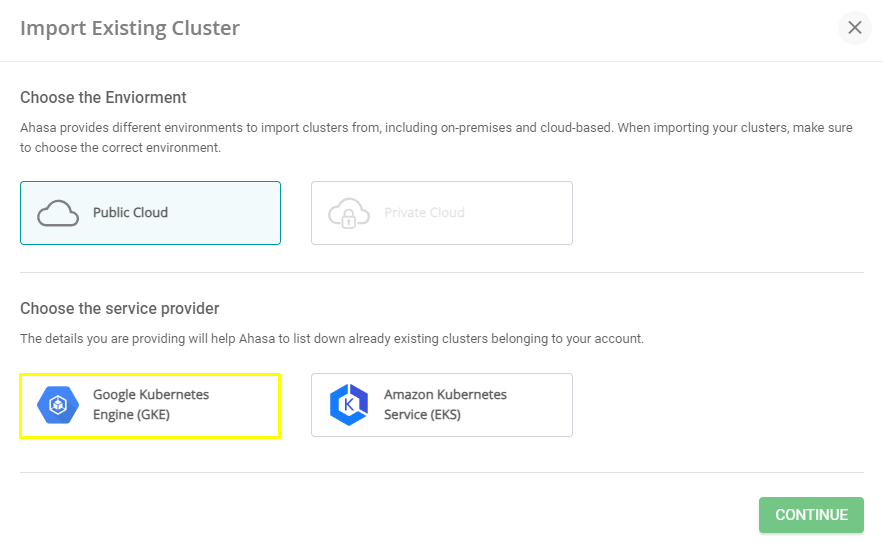
1. Click Public Cloud.

2. Choose the Service Provider as Google Kubernetes Engine (GKE).
3. Browse and enter a Service Account file. The file extension should be .json.

4. Click CONTINUE. All the clusters will be listed as follows. Select a cluster to import. Already imported clusters are disabled to select.

5. Click Import.
10.2.3 Importing a Cluster from Public Cloud Using Amazon Kubernetes Service #
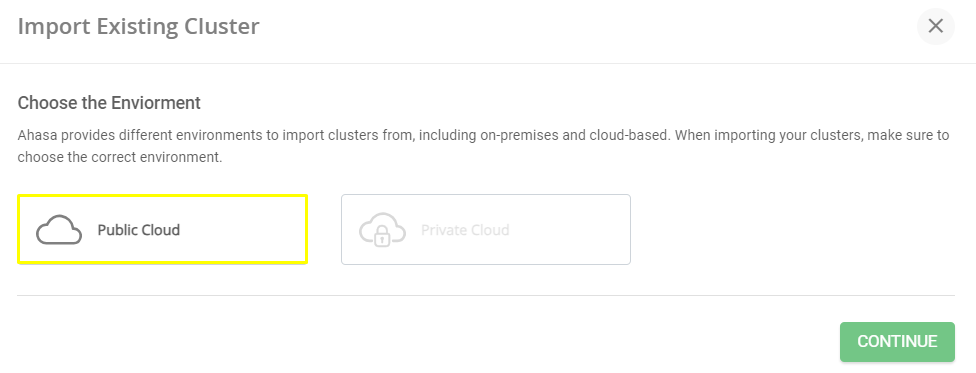
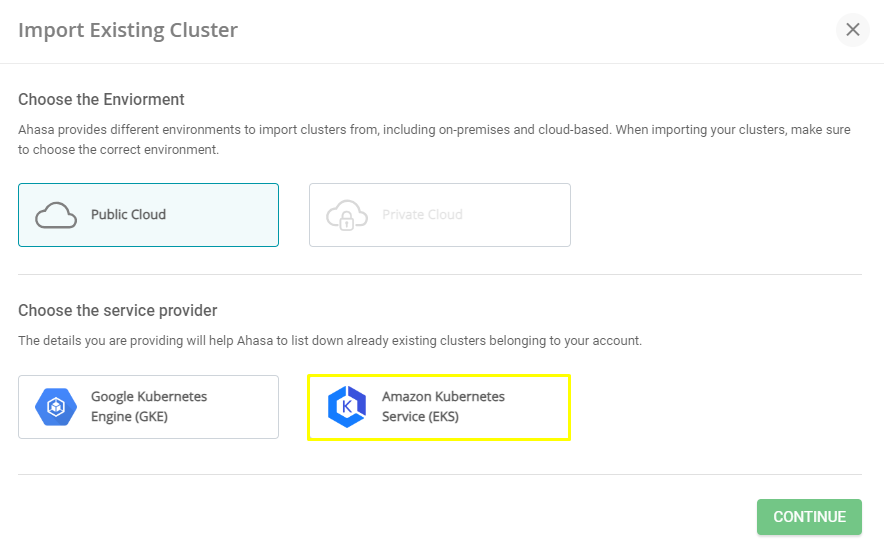
1. Click Public Cloud.
2. Choose the Service Provider as Amazon Kubernetes Service (EKS).
3. Enter the following information.
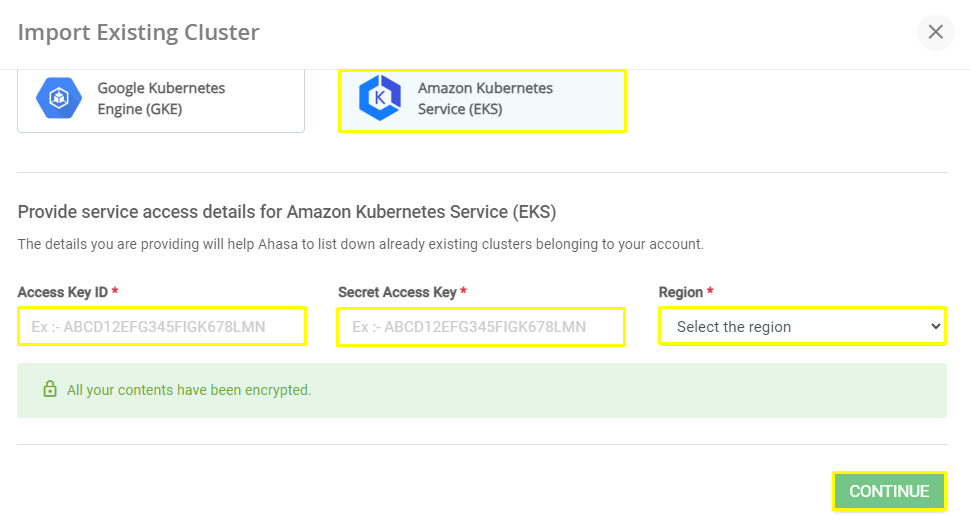
4. Click CONTINUE. All the clusters will be listed as follows. Select a cluster to import. Already imported clusters are disabled to select.

5. Click Import.
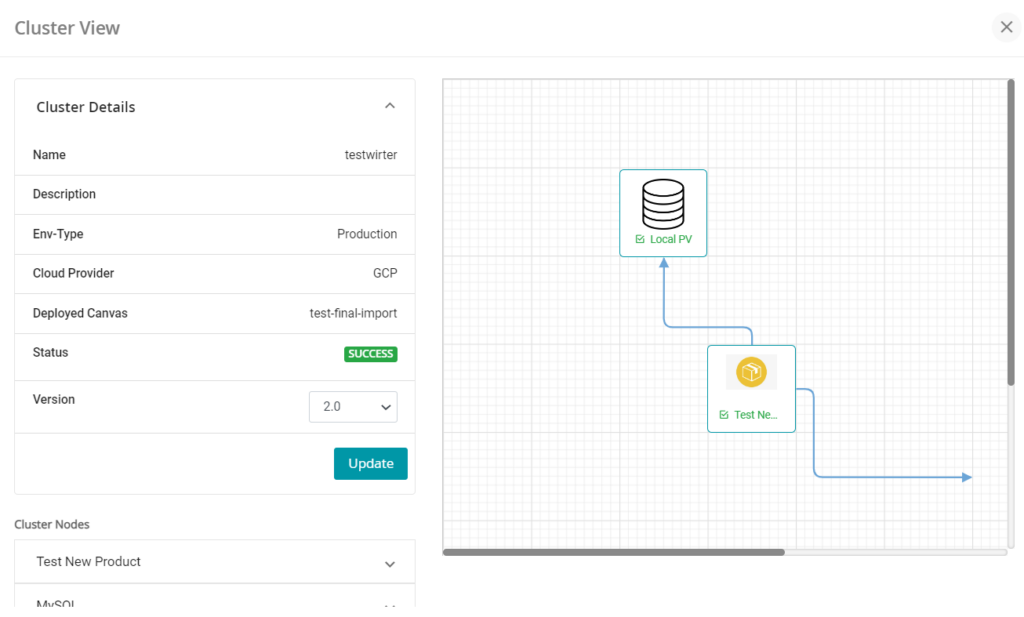
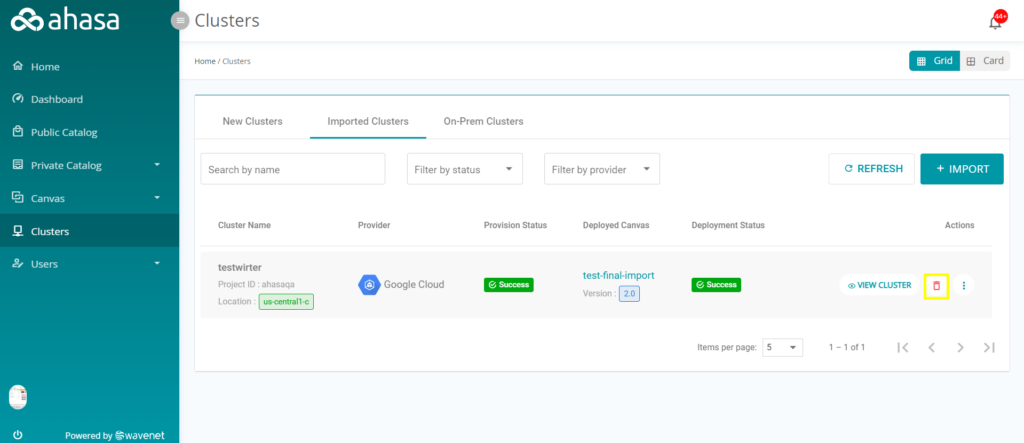
10.2.4 Viewing a Cluster #
1. Login to Ahasa.
2. On the Left Pane, click Clusters.

3. Click Imported Clusters and click ![]() VIEW CLUSTER to view the required cluster. click
VIEW CLUSTER to view the required cluster. click ![]() to view the cluster (Grid View) and click
to view the cluster (Grid View) and click ![]() to view the cluster (Card View).
to view the cluster (Card View).
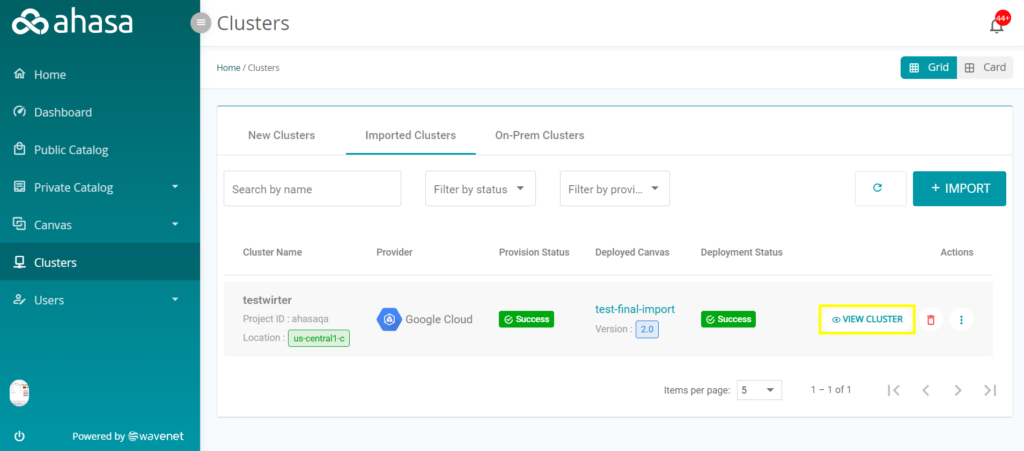
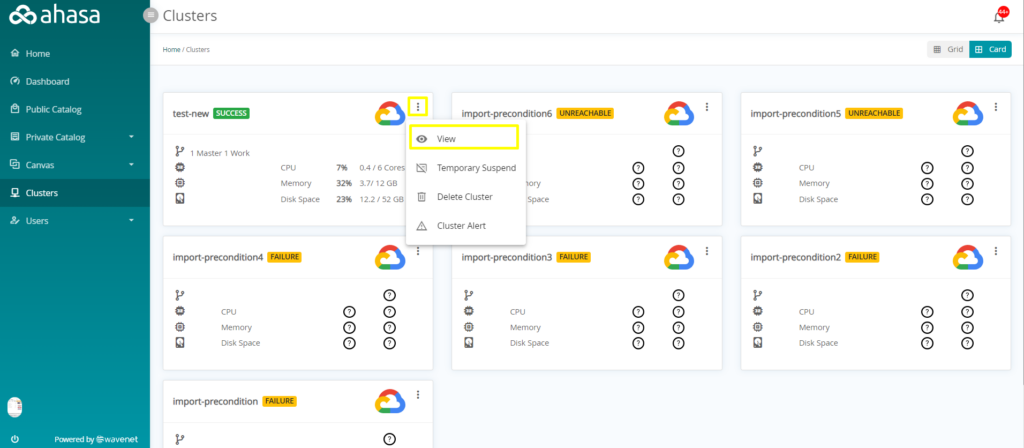
The selected cluster will be displayed. Click Close icon to close the view.
| Cluster Status | Description |
| Success | The cluster is active and healthy. Products can be successfully deployed. |
| Failure | The cluster has failed to initialize/deploy. Products cannot be deployed. |
| Product Deployment | Description |
| Success | All products in the solution are successfully deployed without any errors. |
| Failure | 1. One or more products have failed to deploy in the cluster. 2. Click 3. On the failed products, you can tap the retry icon to retry the deployment. 4. After retrying the failed product deployment, a new email will be sent with the access information of that failed product confirming if it was successful after retrying. |
The below screenshot shows the email received after successfully retrying to deploy a failed product.
10.2.5 Deleting a Cluster #
1. Login to Ahasa.
2. On the Left Pane, click Clusters.

3. In the Imported Clusters section, click ![]() Delete to delete the cluster (Grid View).
Delete to delete the cluster (Grid View).
4. A confirmation will be displayed. Select Delete the deployed canvas/ Force Delete.
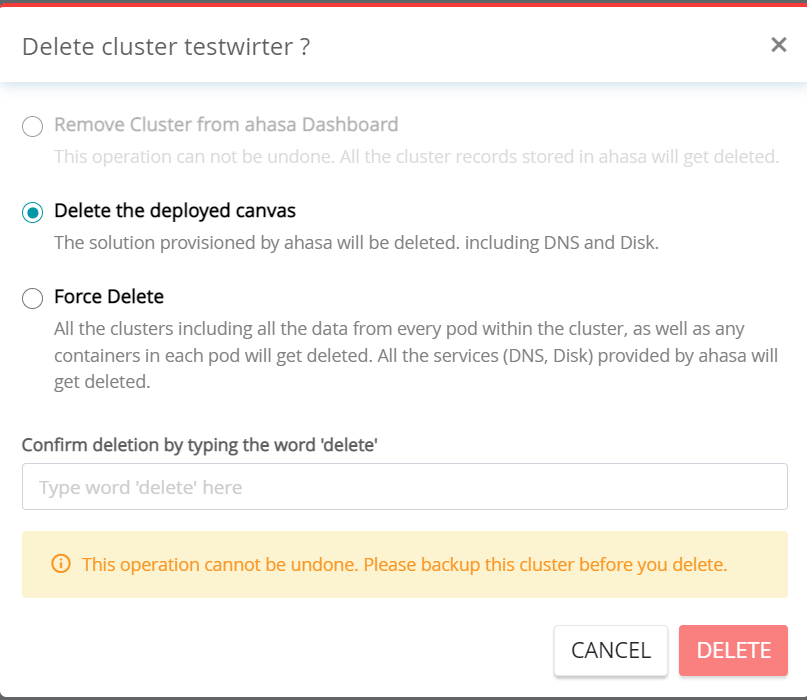
5. Click DELETE to confirm the deletion.
6. Click ![]() Option and select Delete Cluster to delete cluster in Card View.
Option and select Delete Cluster to delete cluster in Card View.
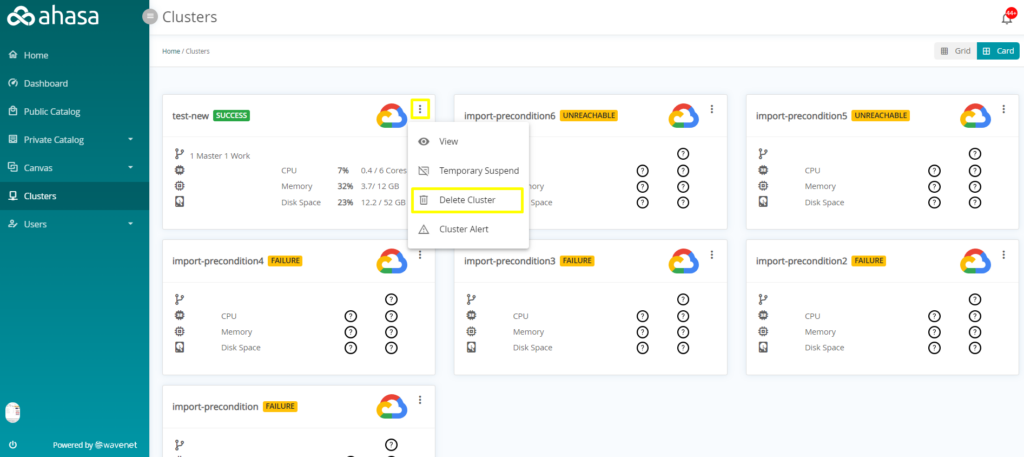
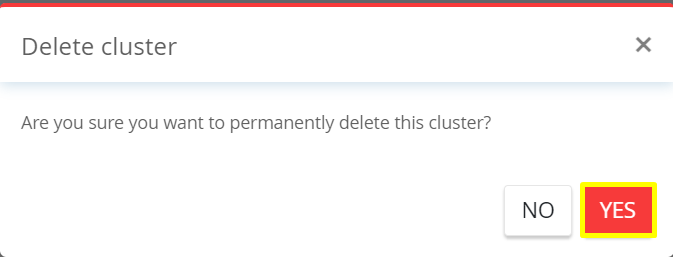
7. Click YES to confirm the deletion.
10.2.6 Temporarily Suspending a Cluster #
1. Login to Ahasa.
2. On the Left Pane, click Clusters.

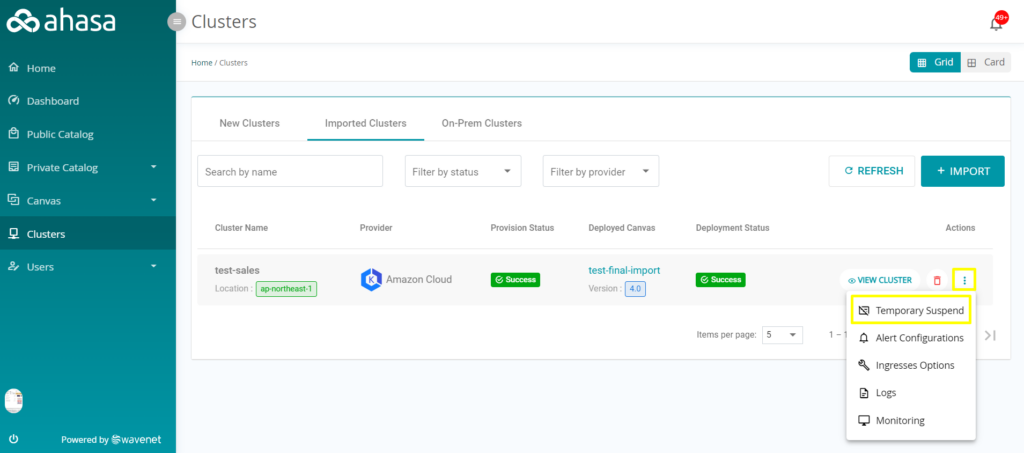
3. In the Imported Clusters section, locate the required cluster and then click ![]() Option to expand the Extra Actions.
Option to expand the Extra Actions.
4. Select Temporary Suspend. Once the cluster is temporarily suspended, it can be reactivated at a later time.
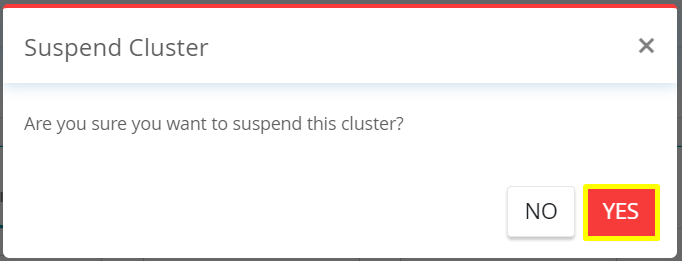
5. Click Yes to confirm the suspension.
10.2.7 Alert Configurations #
1. Login to Ahasa.
2. On the Left Pane, click Clusters.

Figure 10.2.7.1: Navigating to Cluster Management
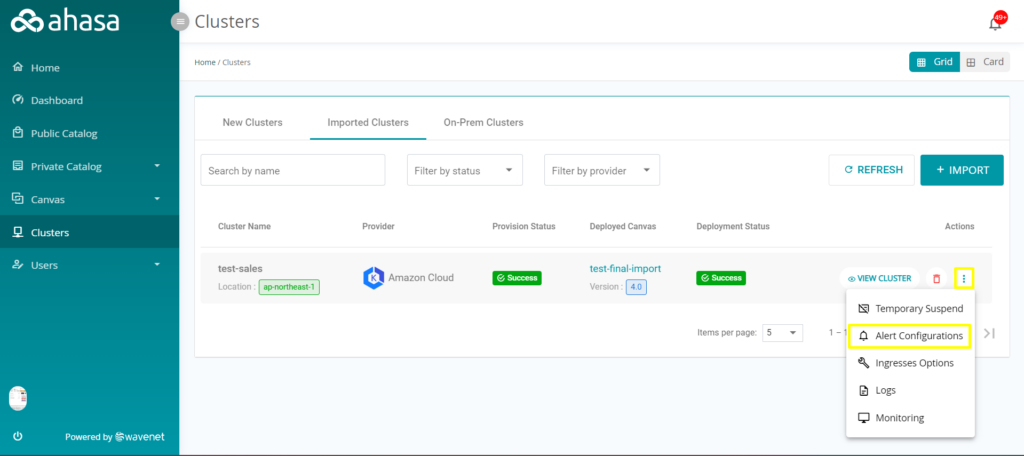
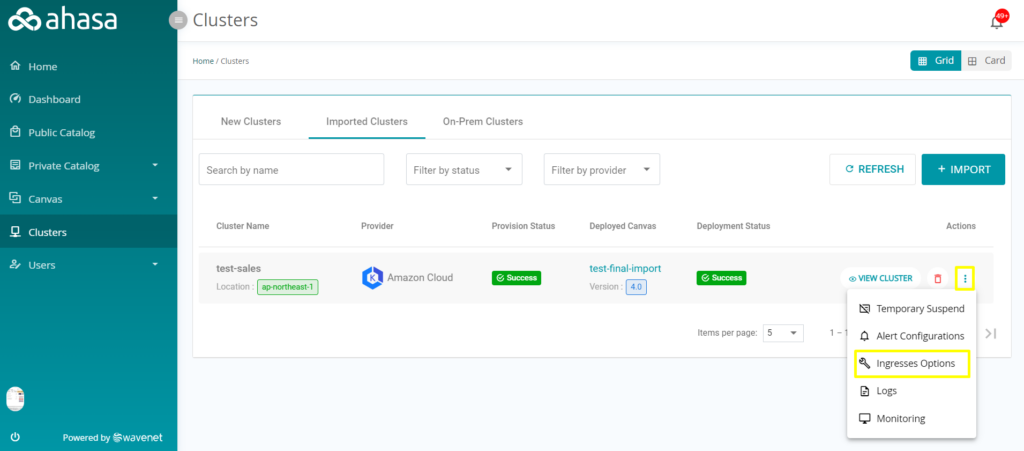
3. In the Imported Clusters section, click ![]() Option to expand the Extra Actions. Select Alert Configurations.
Option to expand the Extra Actions. Select Alert Configurations.
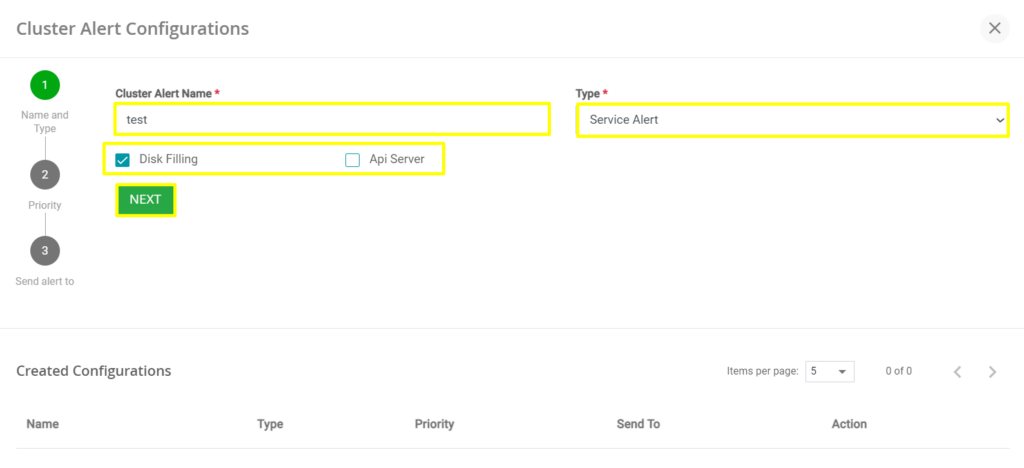
4. Enter Cluster Alert Name, Type and Sub Type. Click NEXT.
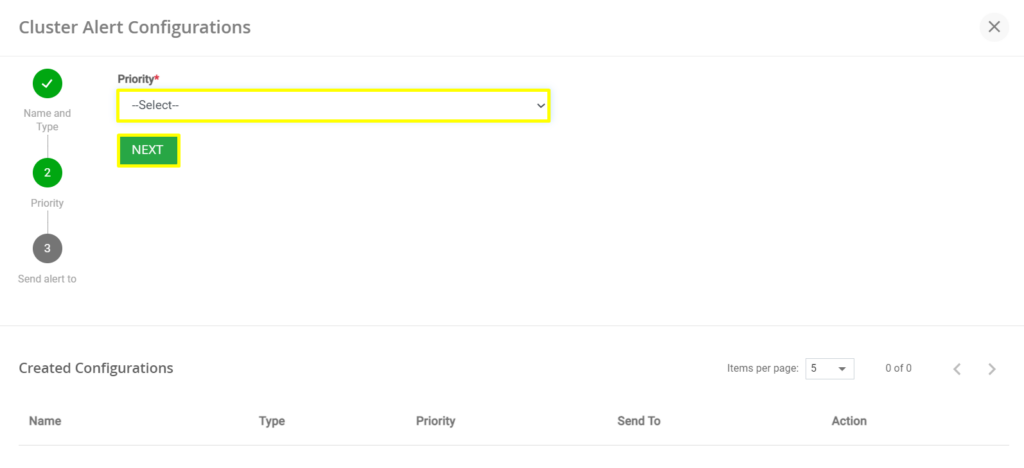
5. Select a Priority from the given dropdown.
6. Select a user to send the alert.

Figure 10.2.7.5: Selecting a User
- Cluster Alert Name – Enter a name for the cluster alert.
- Type – Select type from the given drop down. The available options are Service Alert, Resource Alert, Node Alert. Once you select a Type, Sub Type will be listed below the Type section. Select the sub type.
- Priority – Select a priority from the given drop down. The available options are Critical, Warning, Info.
- Send Alert To – Enter an email address to send the alert.
10.2.8 Ingresses Options #
1. Login to Ahasa.
2. On the Left Pane, click Clusters.

3. In the Imported Clusters section, click ![]() Option to expand the Extra Actions. Select Ingresses Options.
Option to expand the Extra Actions. Select Ingresses Options.
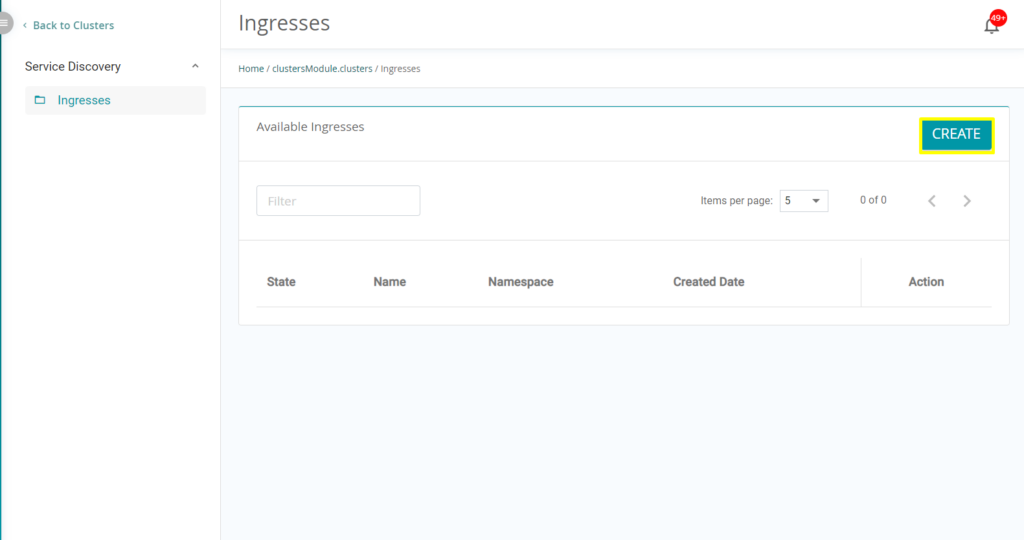
4. Click CREATE.
5. Fill the following information and click ADD RULE.
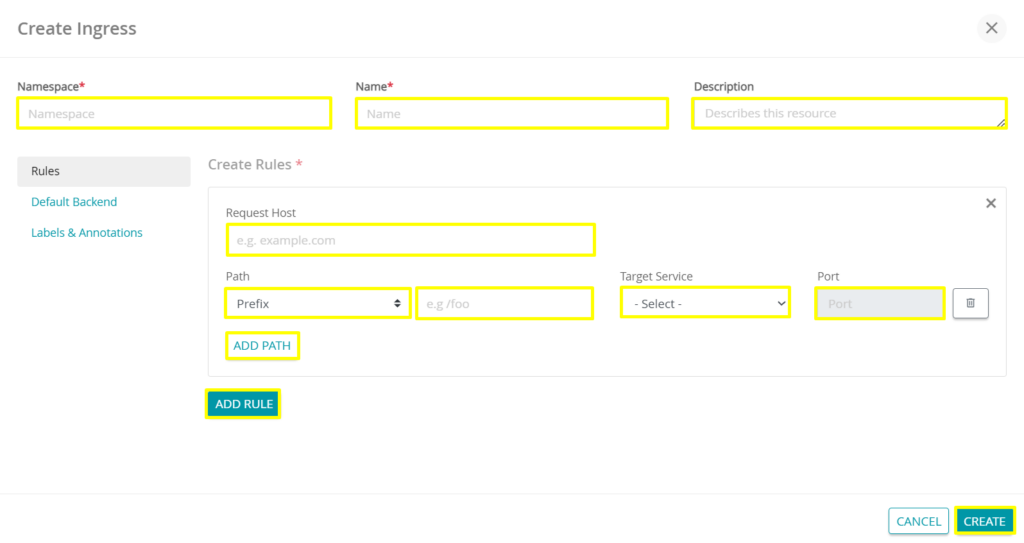
6. Click CREATE.
- Namespace – Namespaces isolates groups of resources within a single cluster. Names of resources need to be unique within a namespace, but not across namespaces. Namespaces cannot be nested inside one another and each Kubernetes resource can only be in one namespace.
- Name – Enter a name.
- Description – Enter a description.
- Request Host – Host must match the content of an incoming request before the load balancer directs traffic to the referenced Service.
- Path – Each path in an Ingress is required to have a corresponding path type. Paths that do not include an explicit pathType will fail validation. There are three supported path types:
- ImplementationSpecific: With this path type, matching is up to the IngressClass. Implementations can treat this as a separate pathType or treat it identically to Prefix or Exact path types.
- Exact: Matches the URL path exactly and with case sensitivity.
- Prefix: Matches based on a URL path prefix split by /. Matching is case sensitive and done on a path element by element basis. A path element refers to the list of labels in the path split by the / separator. A request is a match for path p if every p is an element-wise prefix of p of the request path.
- Target Service – Select Target Service.
- Port – Port used to expose the service on each node in a cluster.
10.2.9 Cluster Logs #
1. Login to Ahasa.
2. On the Left Pane, click Clusters.

3. In the Imported Clusters section, click ![]() Option to expand the Extra Actions. Select Logs.
Option to expand the Extra Actions. Select Logs.
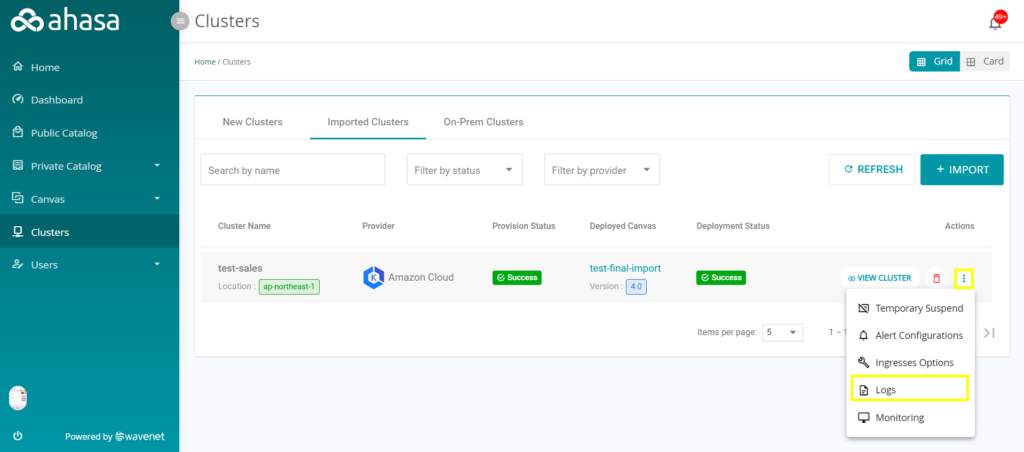
4. Fill the following information.
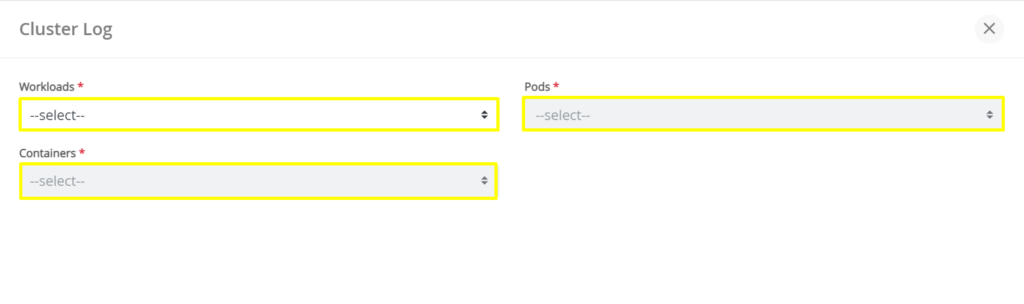
5. The log will be generated as follows.

6. Click RESET to set the fields to default status.
7. Click CLEAR LOG to clear the generated log.
8. Click GENERATE LOG to generate the log again.
- Workloads – Select a workload from the given dropdown.
- Pods – Select a pod from the given dropdown.
- Containers – Select a container from the given dropdown.
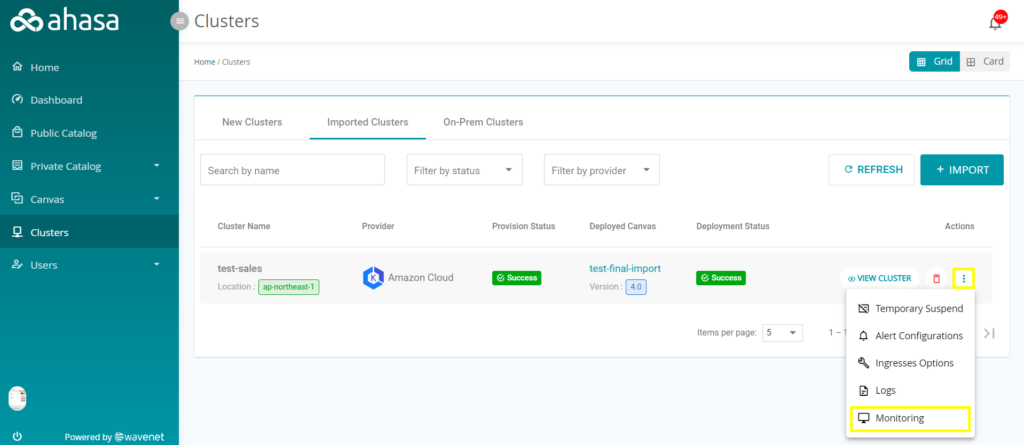
10.2.10 Monitoring a Cluster #
2. On the Left Pane, click Clusters.

3. In the Imported Clusters section, click ![]() Option to expand the Extra Actions. Select Monitoring to go to the monitoring page.
Option to expand the Extra Actions. Select Monitoring to go to the monitoring page.